An amateur journey of digital recording
How to create an HDR Photo in 5 minutes
Unless you have been under a rock, you have heard about HDR photography. HDR stands for High Dynamic Range. HDR photos allow you to make composite photos that are not washed out or too dark. You can also create a stylistic composite that has a surrealist look. Ready to get started? Let’s go.
Getting Started
For the 5-minute HDR photo project you will need a Canon 7D (or other DSLR) and Photoshop CS5 or 5.5. That’s it for equipment. The most important thing you need is the subject matter. Basically, look for a composition where there are bright and dark areas. The brighter the brights and darker the darks the better the result. For this example, I used the top of a palm tree against the blue sky and sun.
Camera Setup
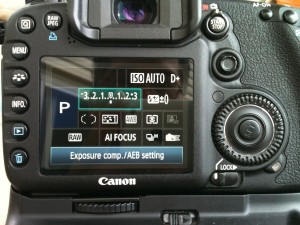
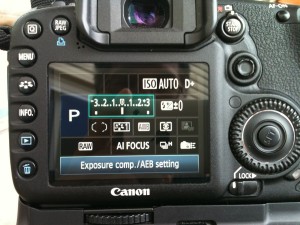
For best results, getting your Canon 7D setup will deliver fast, consistent results. Start by pressing the “Q” button on the upper-left of the back of your Canon 7D. Using the joystick, select the “Exposure comp./AEB setting”. (highlighted in green) Next use your dial control near the shutter button to expand the bracketing. I normally go to plus or minus 3. As far as quality goes you can use JPG or RAW. I like shooting in RAW as it does the least amount of in-camera processing to the image. Also, make sure your camera is set to “High speed continuous” shooting mode.
Take your three pictures
For this 5-minute HDR photo project, we are going to take three photos in rapid succession. For best results you should use a tripod. However, with the right lens and a steady hand, the Canon 7D can do this without one. (My sample photos are hand held) To take the three photos, hold down the shutter button. You will hear the shutter snap three times in rapid succession. Do this many times. Taking photos is free. This will give you more choices to work from. See my set of three below.
Take your images into Photoshop
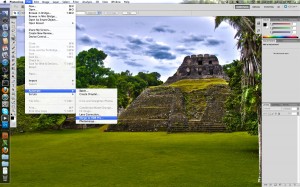
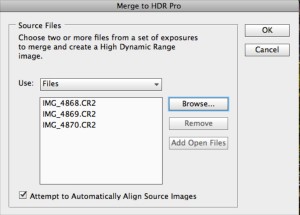
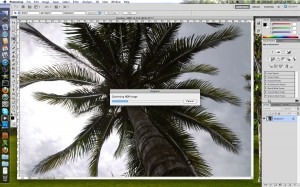
Open up Photoshop (you will need CS5 or later) and select “File>Automate>Merge To HDR Pro…”. Next you will select your source files. Click on the “Browse” tab and navigate to your three images. Click “Ok” to start the processing.
Tweak the HDR settings
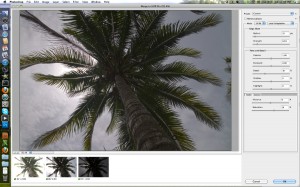
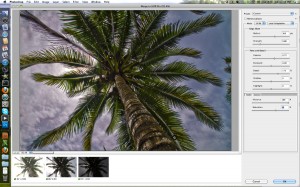
After you import your images a new dialog box will appear with the three images merged into one photo. On the bottom left you will see your three exposures. The green checkboxes let you know those photos are being used in the composite image. You can choose to deselect one of the images and Photoshop will reprocess.
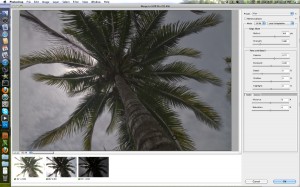
On the right hand side is the control panel. As you can see there are many different presets. Take some time to play around with them. For our project, we are going to select the “Flat” mode in the drop down menu.
Next we are going to adjust the vibrancy. In this example, I moved the dial up to 100%.
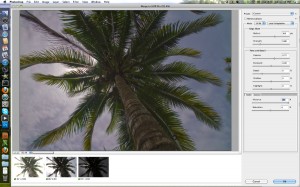
After adjusting the vibrancy, move the detail slider. My palm tree subject looks great with a setting of 175%.
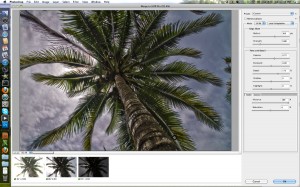
Finally, to really punch up the colors, I added 30% Saturation.
When you are happy with the results, click the “OK” button on the lower left side of the control panel.
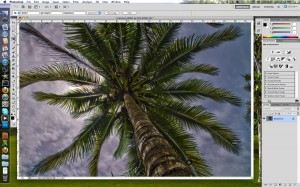
Depending on your computer power, it will take a few seconds to process your HDR photo. Once completed, you can save it as a PSD file or what every format you want. NOTE: A PSD version of this will be extremely large. In some cases it will be over 100MB. Because of this, I generally save the image as the high quality JPG. This will result in a file around 20MB or about the size of a single RAW file.
Summary
That’s it. A relatively simple process can deliver amazing results. When you start taking your own photos you will realize that the results are determined by the shot composition, your subject matter and how steady you are taking the photo. With a little practice, you will produce amazing results.
| Print article | This entry was posted by admin on September 25, 2011 at 9:00 am, and is filed under Photos, Tips & Tricks. Follow any responses to this post through RSS 2.0. Responses are currently closed, but you can trackback from your own site. |
Comments are closed.

