An amateur journey of digital recording
Posts tagged Photoshop

How to create an HDR Photo in 5 minutes
Sep 25th
Unless you have been under a rock, you have heard about HDR photography. HDR stands for High Dynamic Range. HDR photos allow you to make composite photos that are not washed out or too dark. You can also create a stylistic composite that has a surrealist look. Ready to get started? Let’s go.
Getting Started
For the 5-minute HDR photo project you will need a Canon 7D (or other DSLR) and Photoshop CS5 or 5.5. That’s it for equipment. The most important thing you need is the subject matter. Basically, look for a composition where there are bright and dark areas. The brighter the brights and darker the darks the better the result. For this example, I used the top of a palm tree against the blue sky and sun.
Camera Setup
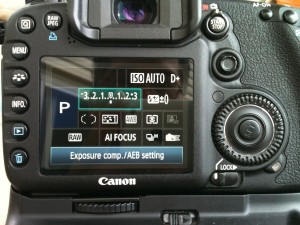
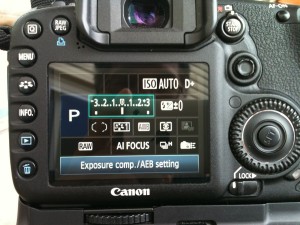
For best results, getting your Canon 7D setup will deliver fast, consistent results. Start by pressing the “Q” button on the upper-left of the back of your Canon 7D. Using the joystick, select the “Exposure comp./AEB setting”. (highlighted in green) Next use your dial control near the shutter button to expand the bracketing. I normally go to plus or minus 3. As far as quality goes you can use JPG or RAW. I like shooting in RAW as it does the least amount of in-camera processing to the image. Also, make sure your camera is set to “High speed continuous” shooting mode.
Take your three pictures
For this 5-minute HDR photo project, we are going to take three photos in rapid succession. For best results you should use a tripod. However, with the right lens and a steady hand, the Canon 7D can do this without one. (My sample photos are hand held) To take the three photos, hold down the shutter button. You will hear the shutter snap three times in rapid succession. Do this many times. Taking photos is free. This will give you more choices to work from. See my set of three below.
Take your images into Photoshop
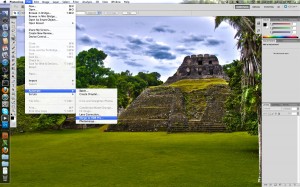
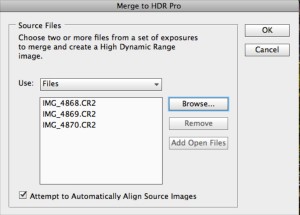
Open up Photoshop (you will need CS5 or later) and select “File>Automate>Merge To HDR Pro…”. Next you will select your source files. Click on the “Browse” tab and navigate to your three images. Click “Ok” to start the processing.
Tweak the HDR settings
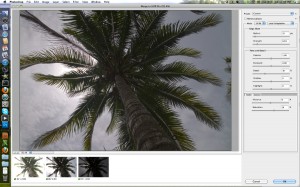
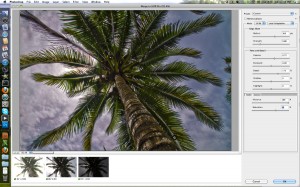
After you import your images a new dialog box will appear with the three images merged into one photo. On the bottom left you will see your three exposures. The green checkboxes let you know those photos are being used in the composite image. You can choose to deselect one of the images and Photoshop will reprocess.
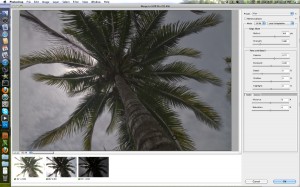
On the right hand side is the control panel. As you can see there are many different presets. Take some time to play around with them. For our project, we are going to select the “Flat” mode in the drop down menu.
Next we are going to adjust the vibrancy. In this example, I moved the dial up to 100%.
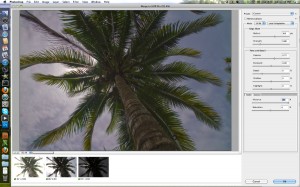
After adjusting the vibrancy, move the detail slider. My palm tree subject looks great with a setting of 175%.
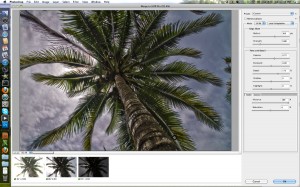
Finally, to really punch up the colors, I added 30% Saturation.
When you are happy with the results, click the “OK” button on the lower left side of the control panel.
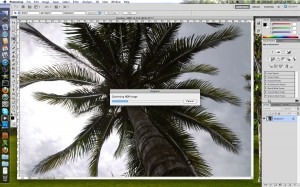
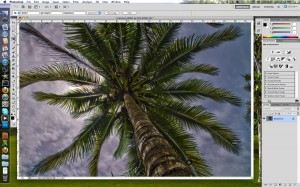
Depending on your computer power, it will take a few seconds to process your HDR photo. Once completed, you can save it as a PSD file or what every format you want. NOTE: A PSD version of this will be extremely large. In some cases it will be over 100MB. Because of this, I generally save the image as the high quality JPG. This will result in a file around 20MB or about the size of a single RAW file.
Summary
That’s it. A relatively simple process can deliver amazing results. When you start taking your own photos you will realize that the results are determined by the shot composition, your subject matter and how steady you are taking the photo. With a little practice, you will produce amazing results.

Digital Workflow – How to share your 7D pictures and video
May 2nd
Now that you have taken those great pictures and video. The next step is how to get them from your Canon 7D to your friends and family. That’s right, we are talking digital workflow. Wikipedia describes workflow as a “sequence of connected steps”. Here is the steps I used starting out with a couple of options based on cost.
Memory Card
This is where it all starts. Currently, I am using two 16GB 133x cards. I also have a 4GB 133x card as a backup. While these cards are not the fastest, they are plenty fast for shooting video. I paid about $40 a card on Amazon.
Memory Card Reader – Getting the files from your 7D to your Computer
Some PC computers will have a build-in card reader that will take your CF cards. Most laptops will not. When I was using a PC laptop, I had a PCM-CIA CF card reader that fit flush in the laptop. That worked well. When I upgraded to a Macbook Pro, there was no card reader at all. (The new ones have a SD card reader) I guess you could use the 7D to transfer the files directly, but that would waste battery power and you really couldn’t use the camera during the transfer.
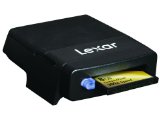
Remember NOT ALL CARD READERS ARE THE SAME. Just because it says USB 2.0 doesn’t mean it has a fast transfer rate. I have multi-card readers and I found something interesting. Both are USB 2.0 but one is significantly faster than the other. When choosing a card reader, try to see if they publish transfer rates. Currently, I am using a card reader I bought at Microcenter. However, I plan to upgrade to a Lexar CompactFlash FireWire 800 Card Reader.
Computer
This is personal preference. Today, I am using a Mac. However, there are some very good PCs out there too. Macs do cost more upfront for the hardware, but I find that in the long run, they are a better investment. One of the advantages of a Mac is the built-in software. All new Macs come with iLife. iLife has a iPhoto for picture editing and organization and iMovie for movie editing. For the price of just the Mac, you are already capable of product great photos and videos with your Canon 7D.
Where to store your files
One of the big challenges for me is where to store my Canon 7D files. The 7D produces great pictures and video at the expense of file size. A RAW photo at the highest resolution will consume about 24MB of storage space. A 12 minute video will eat of 4GB of space. It is easy to see that this will quickly fill up your hard drive on your computer. Here you have a couple of options. You can install a bigger hard drive in your computer. If you have a desktop PC, this is a simple good solution. On a laptop you usually top out around 500GB. I can tell you that this is not enough for a big project. For this reason, I recommend keeping your files on external drives.
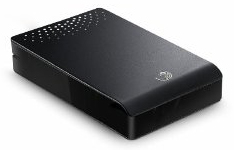
External hard drives are cheap. At this moment, I have two portable external drives (500GB and 1TB) and a larger 1.5TB 3.5″ drive to back up my portable drives. (I also have a 1TB drive that is use to backup my laptop) I cannot stress this enough… BACK UP YOUR DATA. You can’t have too many backups. If you lose your pictures or videos, you can’t get them back. Your memories will be lost forever. So please, back up your data.
Organize your pictures and videos
If you are using a Mac, you can import your pictures and videos off the Canon 7D directly into iPhoto. You can do this with an external drive by placing your iPhoto library on that drive. From there you can use the iPhoto software to organize your photos into events and albums. I recently upgraded to Aperture 3. I actually use a two stage process. First, I import my files onto my external drive. Then I do a quick look at the files using Adobe Bridge. During the quick look, I delete any out of focus, or unwanted pictures or videos. I find with the Canon 7D, most of the pictures are in Focus so it is more of an artistic filtering (closed eyes, funny looks, etc.) Then I import the pictures and videos into Aperture with tags, copyright stuff and event information.
Edit your pictures
On a Mac, a simple solution is to use iPhoto. I have used iPhoto to edit photos with good success. The editing capability of Aperture is even better. Another option that works on both a Mac and PC is Adobe Photoshop and Photoshop Elements. For the cost conscious, Photoshop Elements is usually bundled with Premiere Elements (video editor) for around $150 bucks. For PC users this is the best solution for the money. You will be impressed with the high-quality results you can get using the lite version. For serious photographers, I would recommend using Adobe’s Lightroom and Photoshop. Lightroom is available on both Mac and PC and is a direct competitor to Aperture. For more advanced photo editing, Adobe’s Photoshop has no equal. If I am printing a photo, I will usually do tweaking in Photoshop.
Photoshop is expensive. However, if you are a student or work at a university, you can get the educational discount which is huge. Also most university stores will have the software available at the discounted rate.
Edit your videos
On a Mac, iMovie is a great basic video editor. I have found I can produce great results. For more editing capabilities, upgrade to Final Cut express. Both iMovie and Final Cut Express have a limitation. They will not edit video in 24p (24 progressive frames per second) that gives you that cinema look. They only way to get that is to use Final Cut Pro or Adobe Premiere Pro (pretty sure that Premiere Pro edits in 24P). On a PC there are several options. Premier Pro is one standard. There are other programs that people like on the PC, but I have not used them.
Share your pictures and video
For sharing pictures, I use Flickr. F It has direct integration with iPhoto and Aperture. There is also great plug-ins and programs to help mass uploads. If you plan to share many photos, I would recommend upgrading to the Pro account. It is relatively inexpensive $25 a year for unlimited uploads and the ability to group photos in many different sets and collections. For video, the two I use are YouTube and Vimeo. Please check out my article comparing the two services for more information. YouTube vs. Vimeo
Conclusion
This post was supposed to be quick, but when writing this I realized there is a ton of things to decide when taking, processing and sharing your work. I hope this article sheds some light on the subject. Please let me know what you think.

