An amateur journey of digital recording
Posts tagged Tamron

How to create an HDR Photo in 5 minutes
Sep 25th
Unless you have been under a rock, you have heard about HDR photography. HDR stands for High Dynamic Range. HDR photos allow you to make composite photos that are not washed out or too dark. You can also create a stylistic composite that has a surrealist look. Ready to get started? Let’s go.
Getting Started
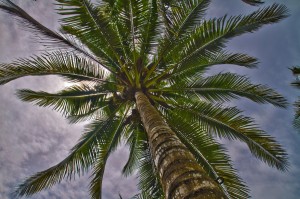
For the 5-minute HDR photo project you will need a Canon 7D (or other DSLR) and Photoshop CS5 or 5.5. That’s it for equipment. The most important thing you need is the subject matter. Basically, look for a composition where there are bright and dark areas. The brighter the brights and darker the darks the better the result. For this example, I used the top of a palm tree against the blue sky and sun.
Camera Setup
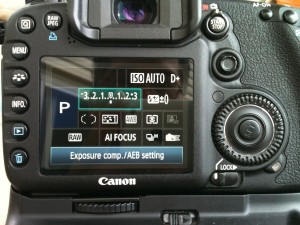
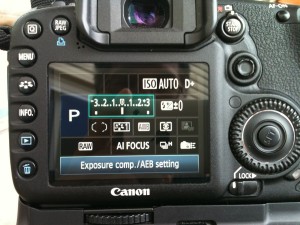
For best results, getting your Canon 7D setup will deliver fast, consistent results. Start by pressing the “Q” button on the upper-left of the back of your Canon 7D. Using the joystick, select the “Exposure comp./AEB setting”. (highlighted in green) Next use your dial control near the shutter button to expand the bracketing. I normally go to plus or minus 3. As far as quality goes you can use JPG or RAW. I like shooting in RAW as it does the least amount of in-camera processing to the image. Also, make sure your camera is set to “High speed continuous” shooting mode.
Take your three pictures
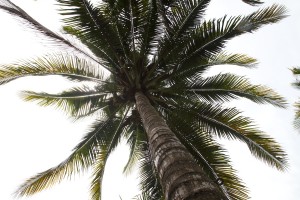
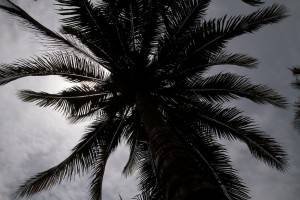
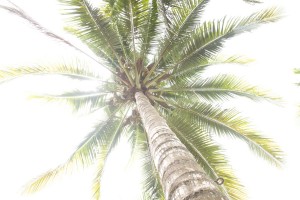
For this 5-minute HDR photo project, we are going to take three photos in rapid succession. For best results you should use a tripod. However, with the right lens and a steady hand, the Canon 7D can do this without one. (My sample photos are hand held) To take the three photos, hold down the shutter button. You will hear the shutter snap three times in rapid succession. Do this many times. Taking photos is free. This will give you more choices to work from. See my set of three below.
Take your images into Photoshop
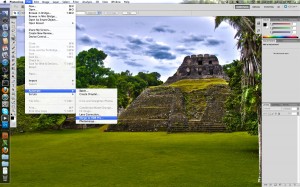
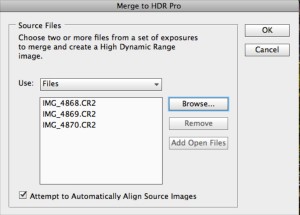
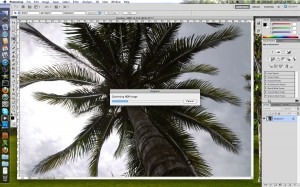
Open up Photoshop (you will need CS5 or later) and select “File>Automate>Merge To HDR Pro…”. Next you will select your source files. Click on the “Browse” tab and navigate to your three images. Click “Ok” to start the processing.
Tweak the HDR settings
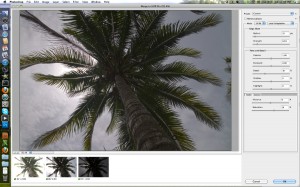
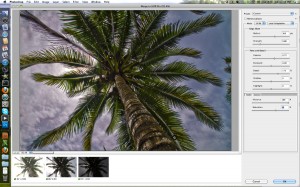
After you import your images a new dialog box will appear with the three images merged into one photo. On the bottom left you will see your three exposures. The green checkboxes let you know those photos are being used in the composite image. You can choose to deselect one of the images and Photoshop will reprocess.
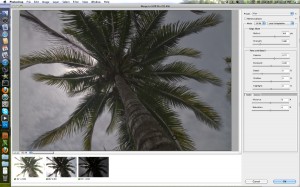
On the right hand side is the control panel. As you can see there are many different presets. Take some time to play around with them. For our project, we are going to select the “Flat” mode in the drop down menu.
Next we are going to adjust the vibrancy. In this example, I moved the dial up to 100%.
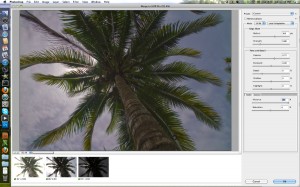
After adjusting the vibrancy, move the detail slider. My palm tree subject looks great with a setting of 175%.
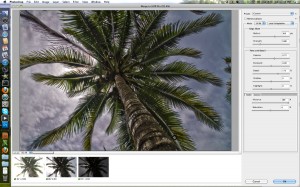
Finally, to really punch up the colors, I added 30% Saturation.
When you are happy with the results, click the “OK” button on the lower left side of the control panel.
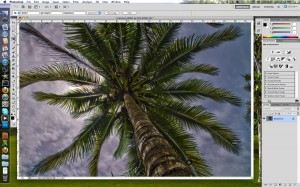
Depending on your computer power, it will take a few seconds to process your HDR photo. Once completed, you can save it as a PSD file or what every format you want. NOTE: A PSD version of this will be extremely large. In some cases it will be over 100MB. Because of this, I generally save the image as the high quality JPG. This will result in a file around 20MB or about the size of a single RAW file.
Summary
That’s it. A relatively simple process can deliver amazing results. When you start taking your own photos you will realize that the results are determined by the shot composition, your subject matter and how steady you are taking the photo. With a little practice, you will produce amazing results.

Photo of the day #17 Kitty Boy
Jul 30th
Photo #17
Here is photo #17 for the 365 Picture Project. One picture a day for a year.
Here is a picture of my family cat. The king of the house. This photo was one of the first photos taken with my Tamron 17-50mm f2.8 VC. Great lens.
Camera: Canon 7D
Lens: 17-50mm
F-stop: 2.8
Focal Length: 300mm
Exposure: 1/25
ISO: 3200
Lighting, Lighting, Lighting – Shooting in 720p versus 1080p
Sep 2nd
 I recently attended the Cincinnati JACL Potluck. Great food and company and Taiko Drummers. The room was relatively small. To shoot the video, I used the Tamron 17-50mm f2.8 VC lens my Canon 7D with my zoom H4n for audio. Finally, I matched up the audio and video using Final Cut Express. (Can’t wait to get FCP)
First, it was a very good thing i decided to use the Zoom H4n for audio. When I got home, the audio off the Canon was severely clipped and sounded like, well… you know what it sounded like. In order to get the transients corrrect on the H4n, I had to manually reduce the recording level to 20 (Which is real low). The results speak for themselves. The audio really does capture the dynamics that we experienced live.
For the first video, I thought I would try to record in 720p 60fps. My thought process was that the high speed of the drummers would be better captured at the higher frame rate. When I looked at the full res version of the video I was, not impressed. Here is the video below.
720p 60fps + Low Light = Digital Noise!
I was really surprised to see all the digital noise on the drum casing. At first, I thought is was an issue with the lens. Luckily, I recorded one of their later songs (performance?) in 1080p 24fps. There is a significant difference. See the video below.
1080p 24fps + Low Light = Less Digital Noise
Even in the compressed youtube version, you can still see a significant improvement in the digital noise. What gives. So I looked at my settings for my Canon 7D. In the 720p mode, I have the shutter speed set to 125 or roughly double what the fps (frames per second) spec of this recording mode. In the 1080p mode, I have the shutter speed set to a lower 50 speed. From these settings I can assume that more light will get let in at the lower setting. This makes sense.
Conclusion
I guess I learned the hard way that if you shoot at higher frame rates, you need more light. Duh. The ambient light was not enough to prevent the digital noise captured in the 720p mode. Good lesson. Let me know what you think.
