An amateur journey of digital recording
Posts tagged Youtube

Tamron 17-50mm f2.8 VC Lens Review
Aug 18th
 I already bought the best bang for the buck Canon 50mm f1.8 prime lens and had the Canon 28-135mm f3.5-5.6 and a Sigma 70-300mm f4-5.6 macro lens taken from my previous DSLR. After using the Canon 50mm, it was obvious to me that I needed a lens that could shoot wider, and also has a similar f-stop for shooting pictures and video in lower light. After careful consideration, I decided that my next lens purchase would be a 17-50 lens.
There were several choices from the major lens makers. All the ones I considered had constant f-stop of 2.8 and all where relatively similar in range. I narrowed it down to the Canon EF-S 17-55 and the Tamron 17-50. Both had nearly identical features. In the end, the price advantage ($1060 versus $649 minus the $70 mail in rebate) of the Tamron, won me over.
It is very important to note that you only get the rebate (and the fantastic 6 year warranty) when you purchase the Tamron from an authorized dealer. Luckily, I was able to find a somewhat local dealer Click Camera and they match B & H photos online price.
Looking at the lens
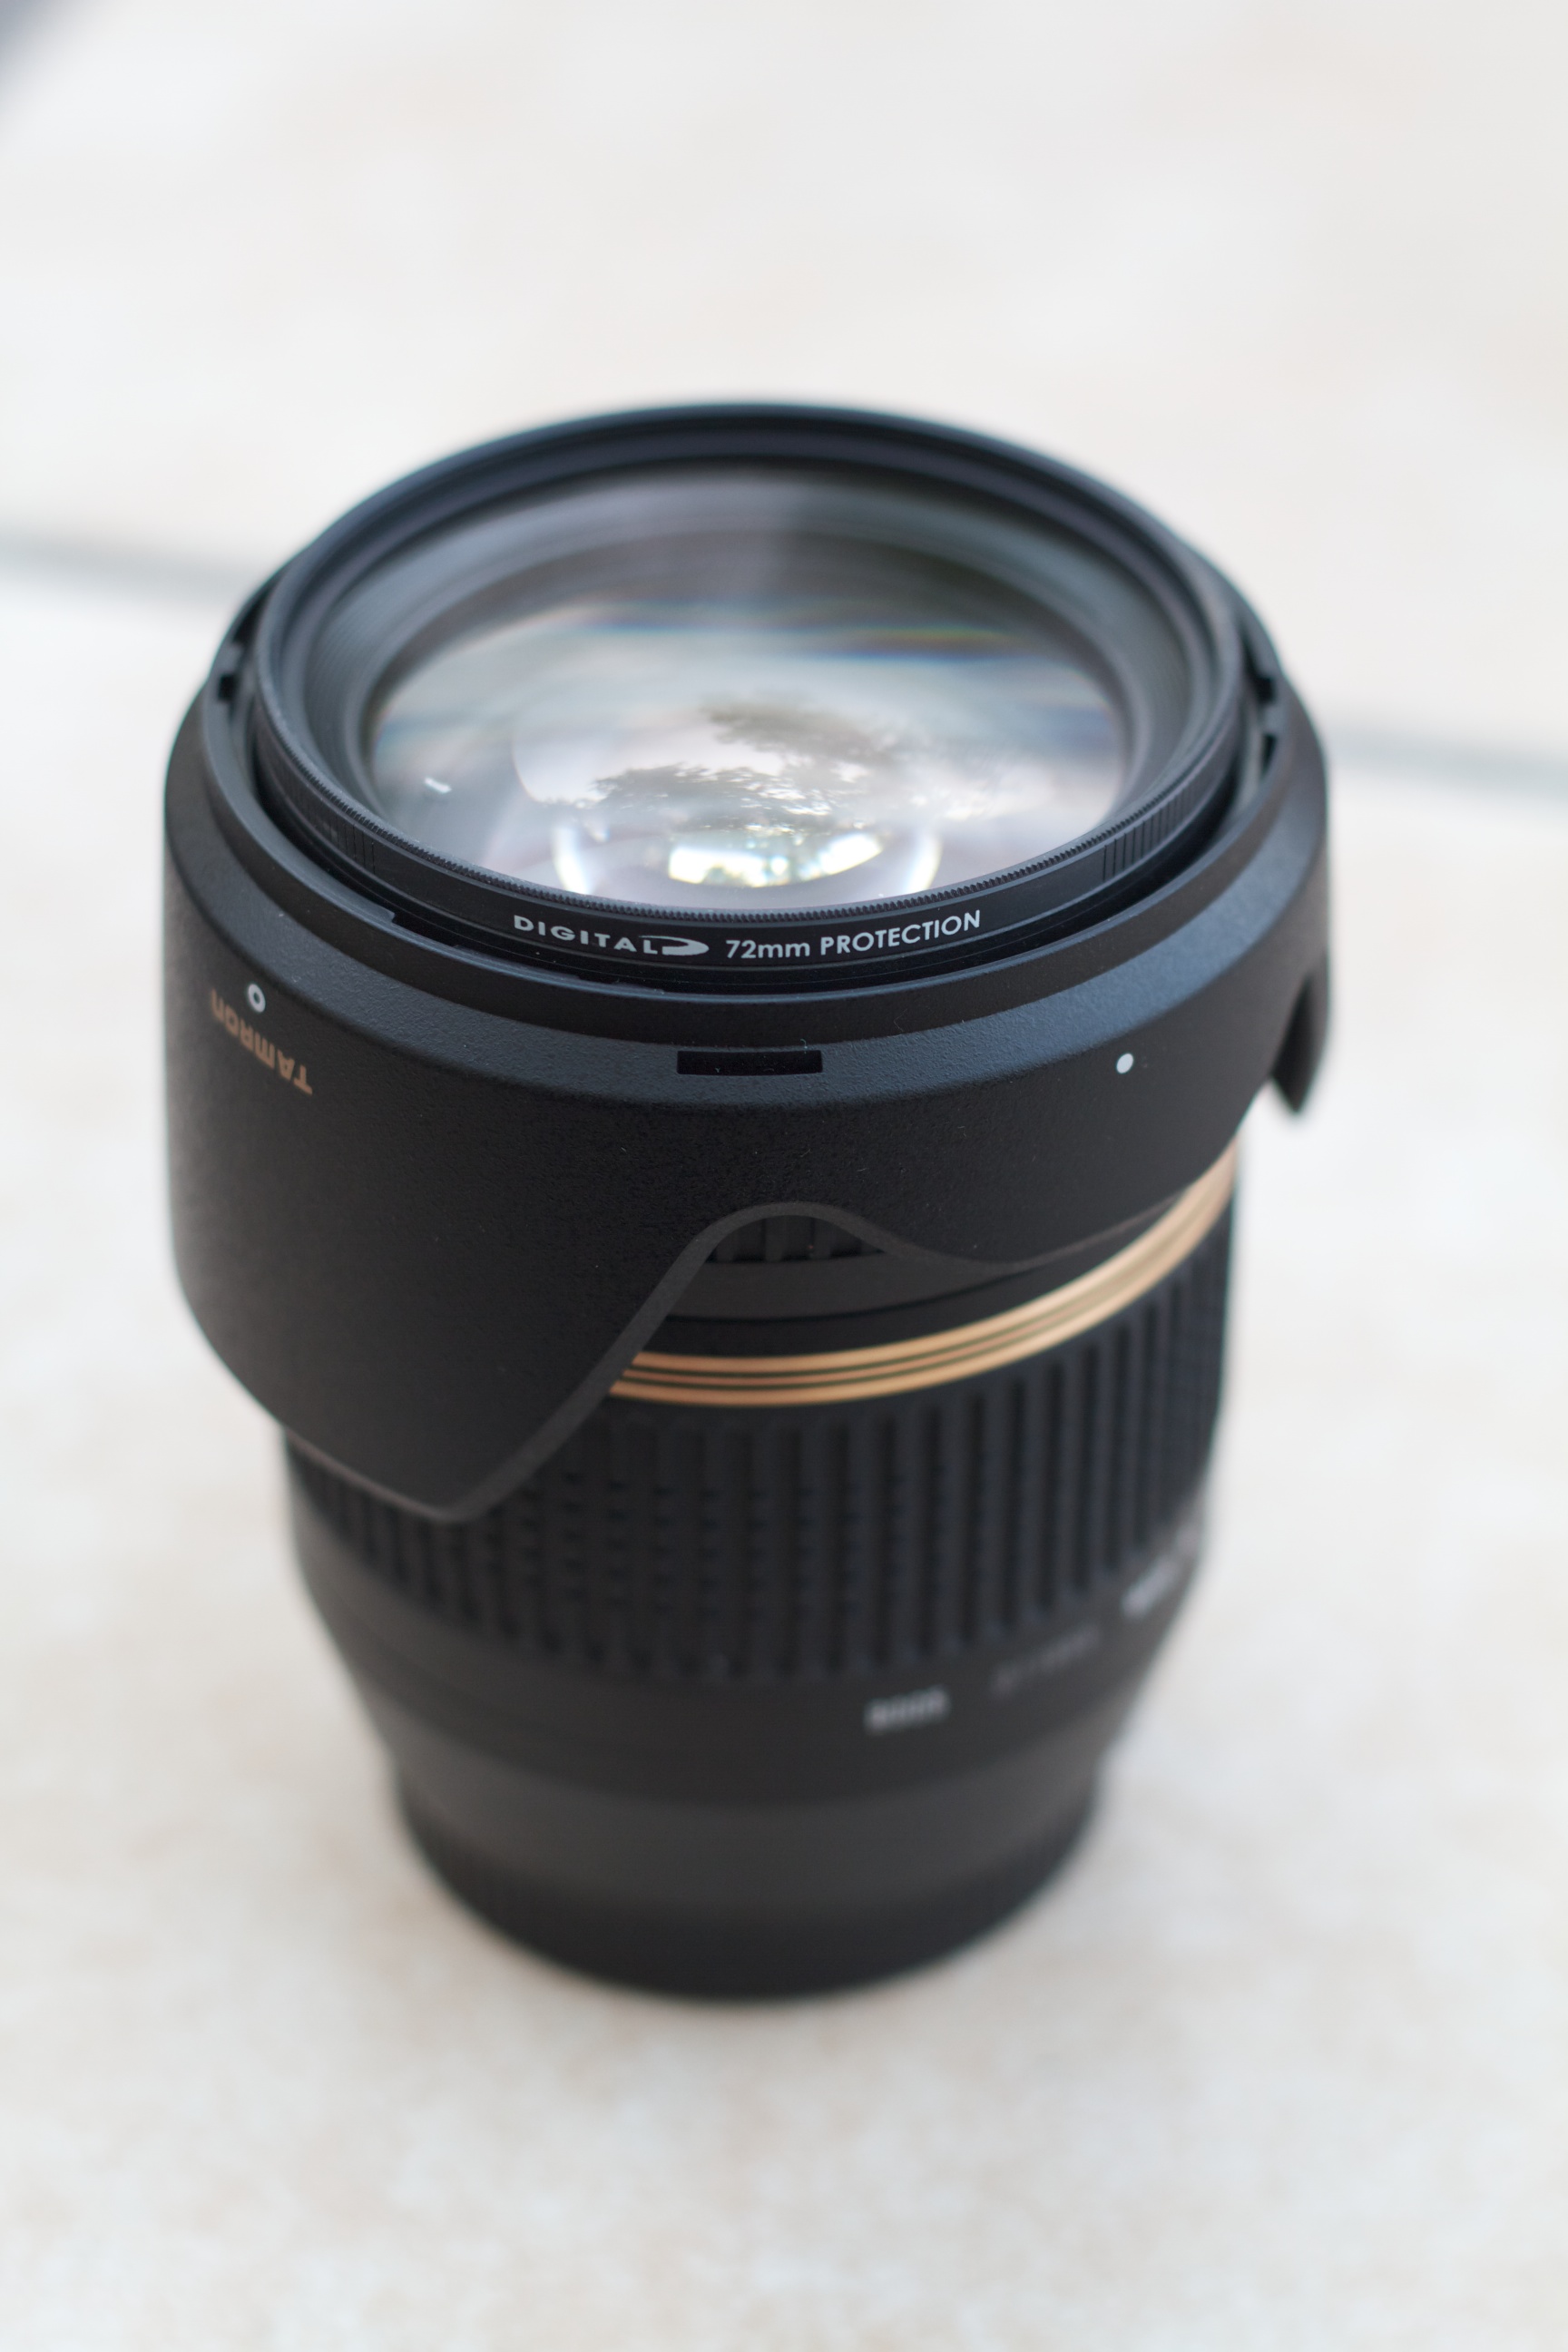
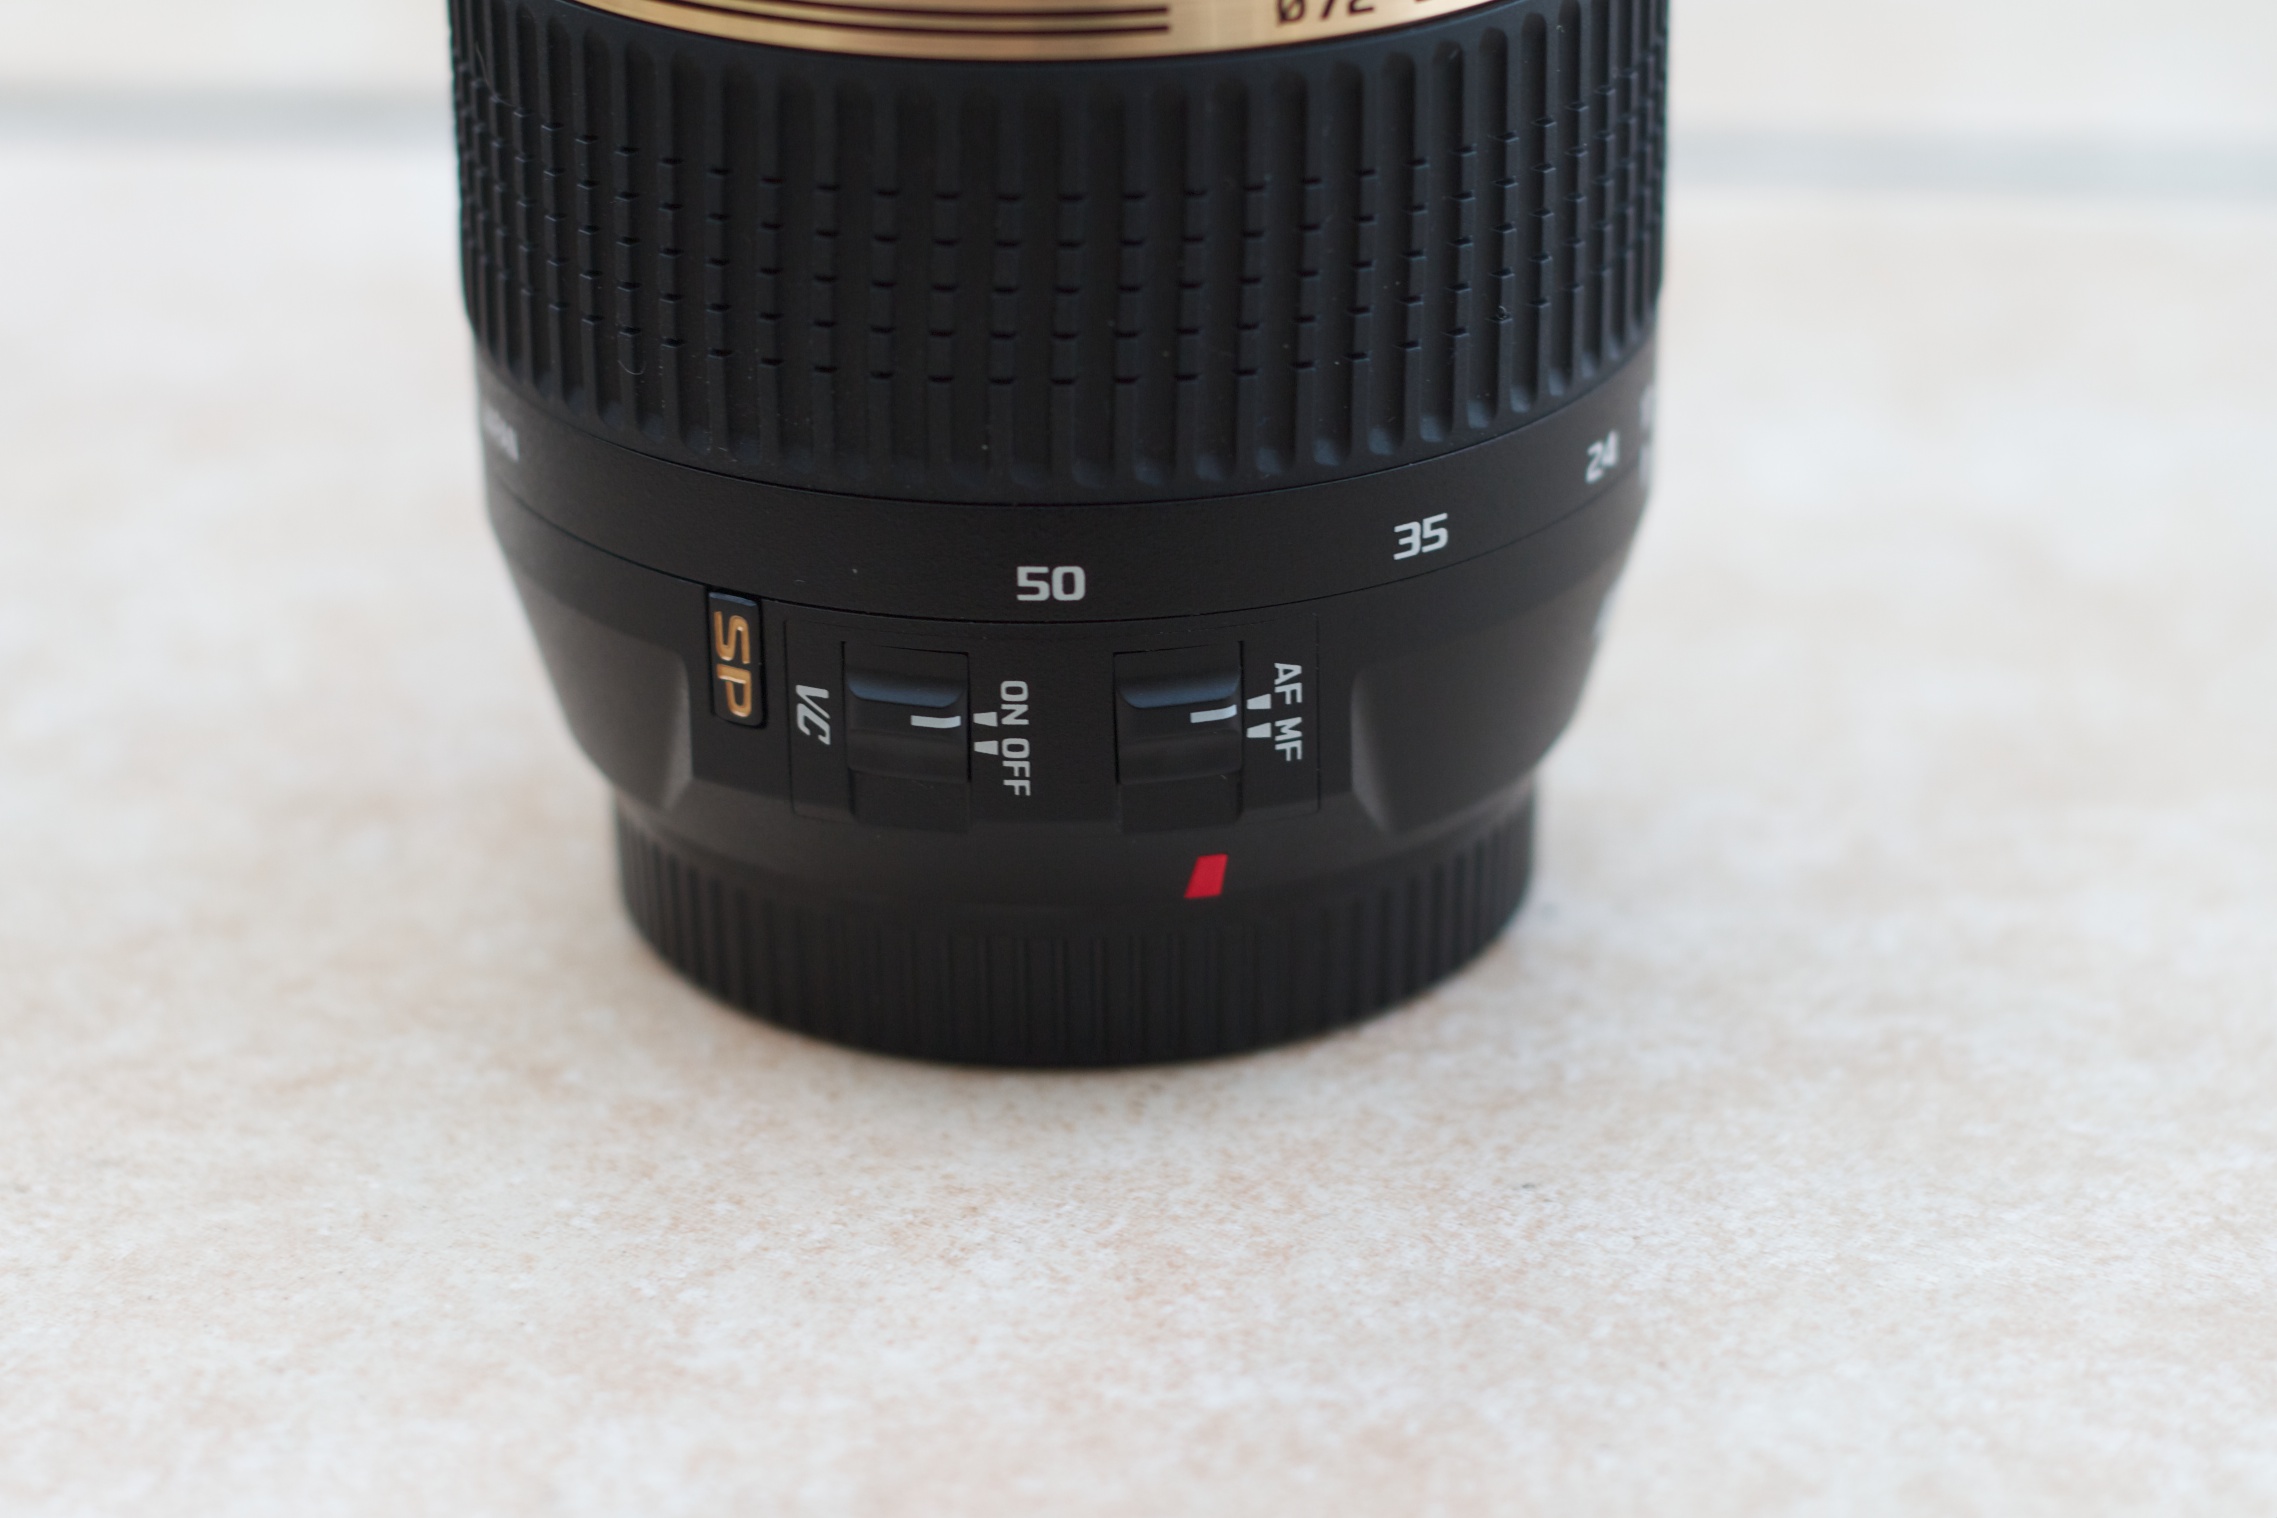
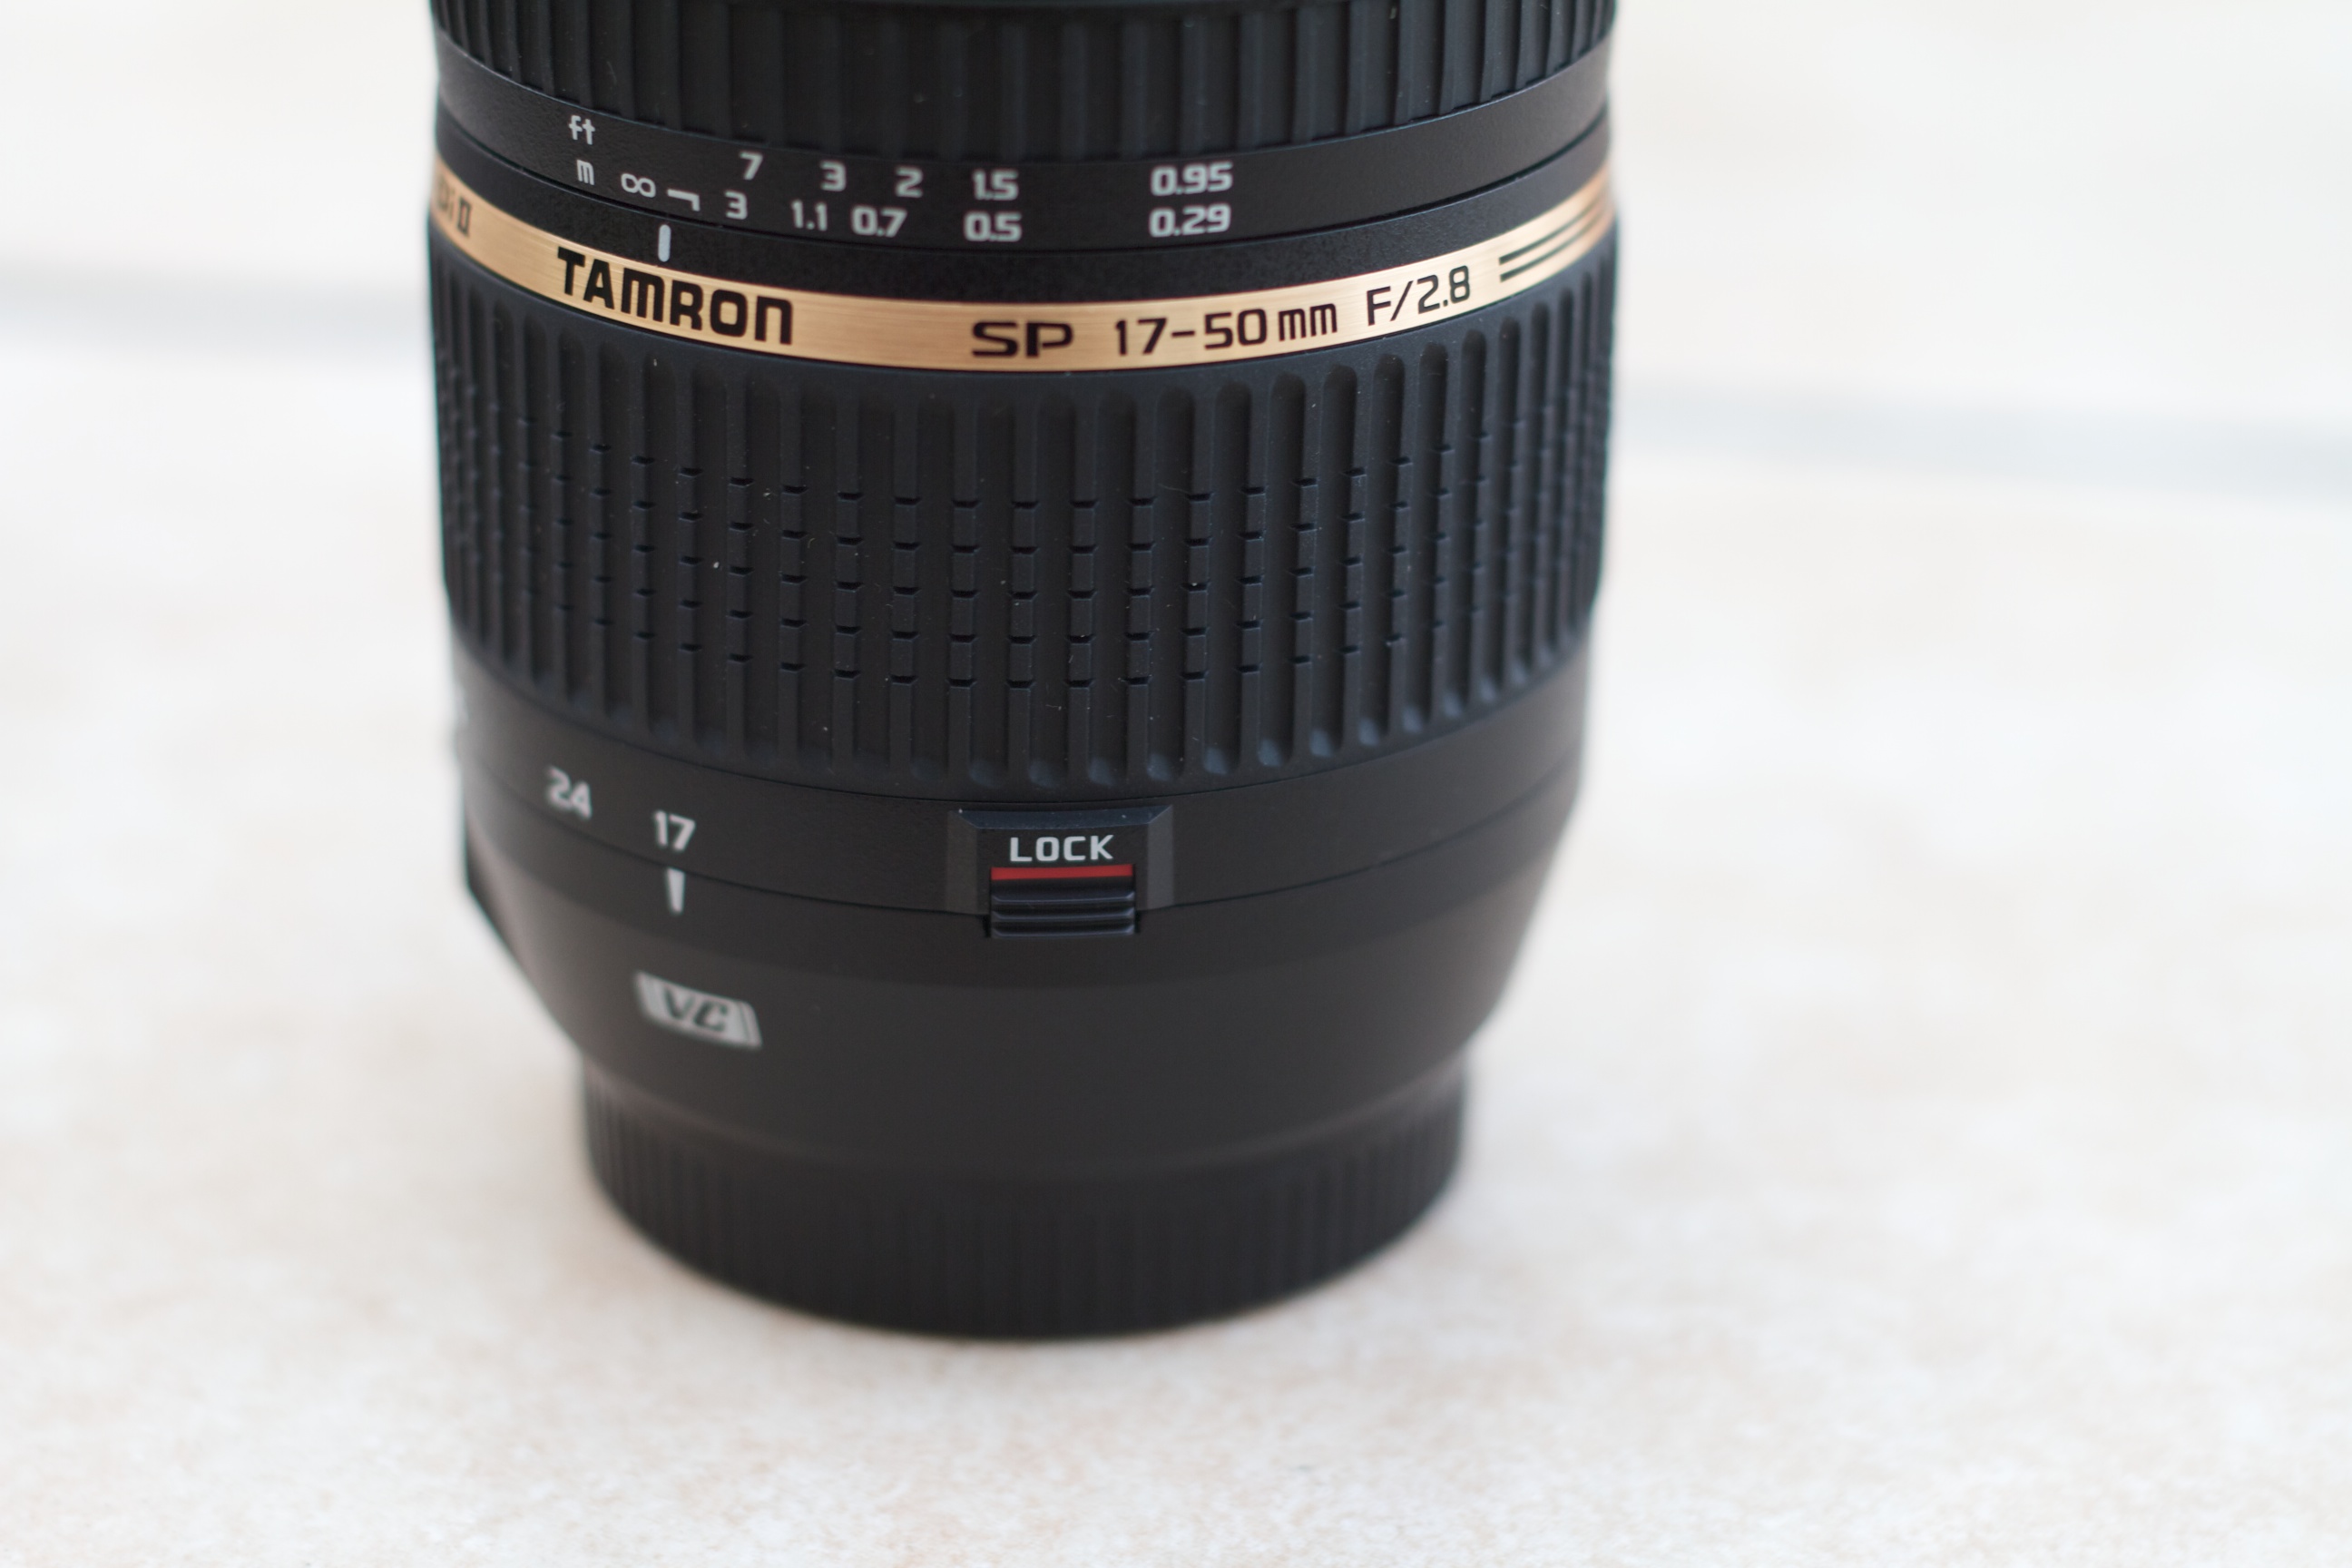
The Tamron lens is a 17-50mm lens that has a constant f-stop of 2.8. There are two advantages to this constant f-stop lens. The most obvious is the ability to work well in lower light. This is true for both photos and in video mode. In low-light situations, the constant f-stop prevents having to change the settings on the camera or having the images and video get darker as I zoom in. This may not seem real important now, but just wait until you are shooting indoors and find yourself having to constantly change your settings based on your zoom level. With the Tamron lens, you can just set it and shoot.
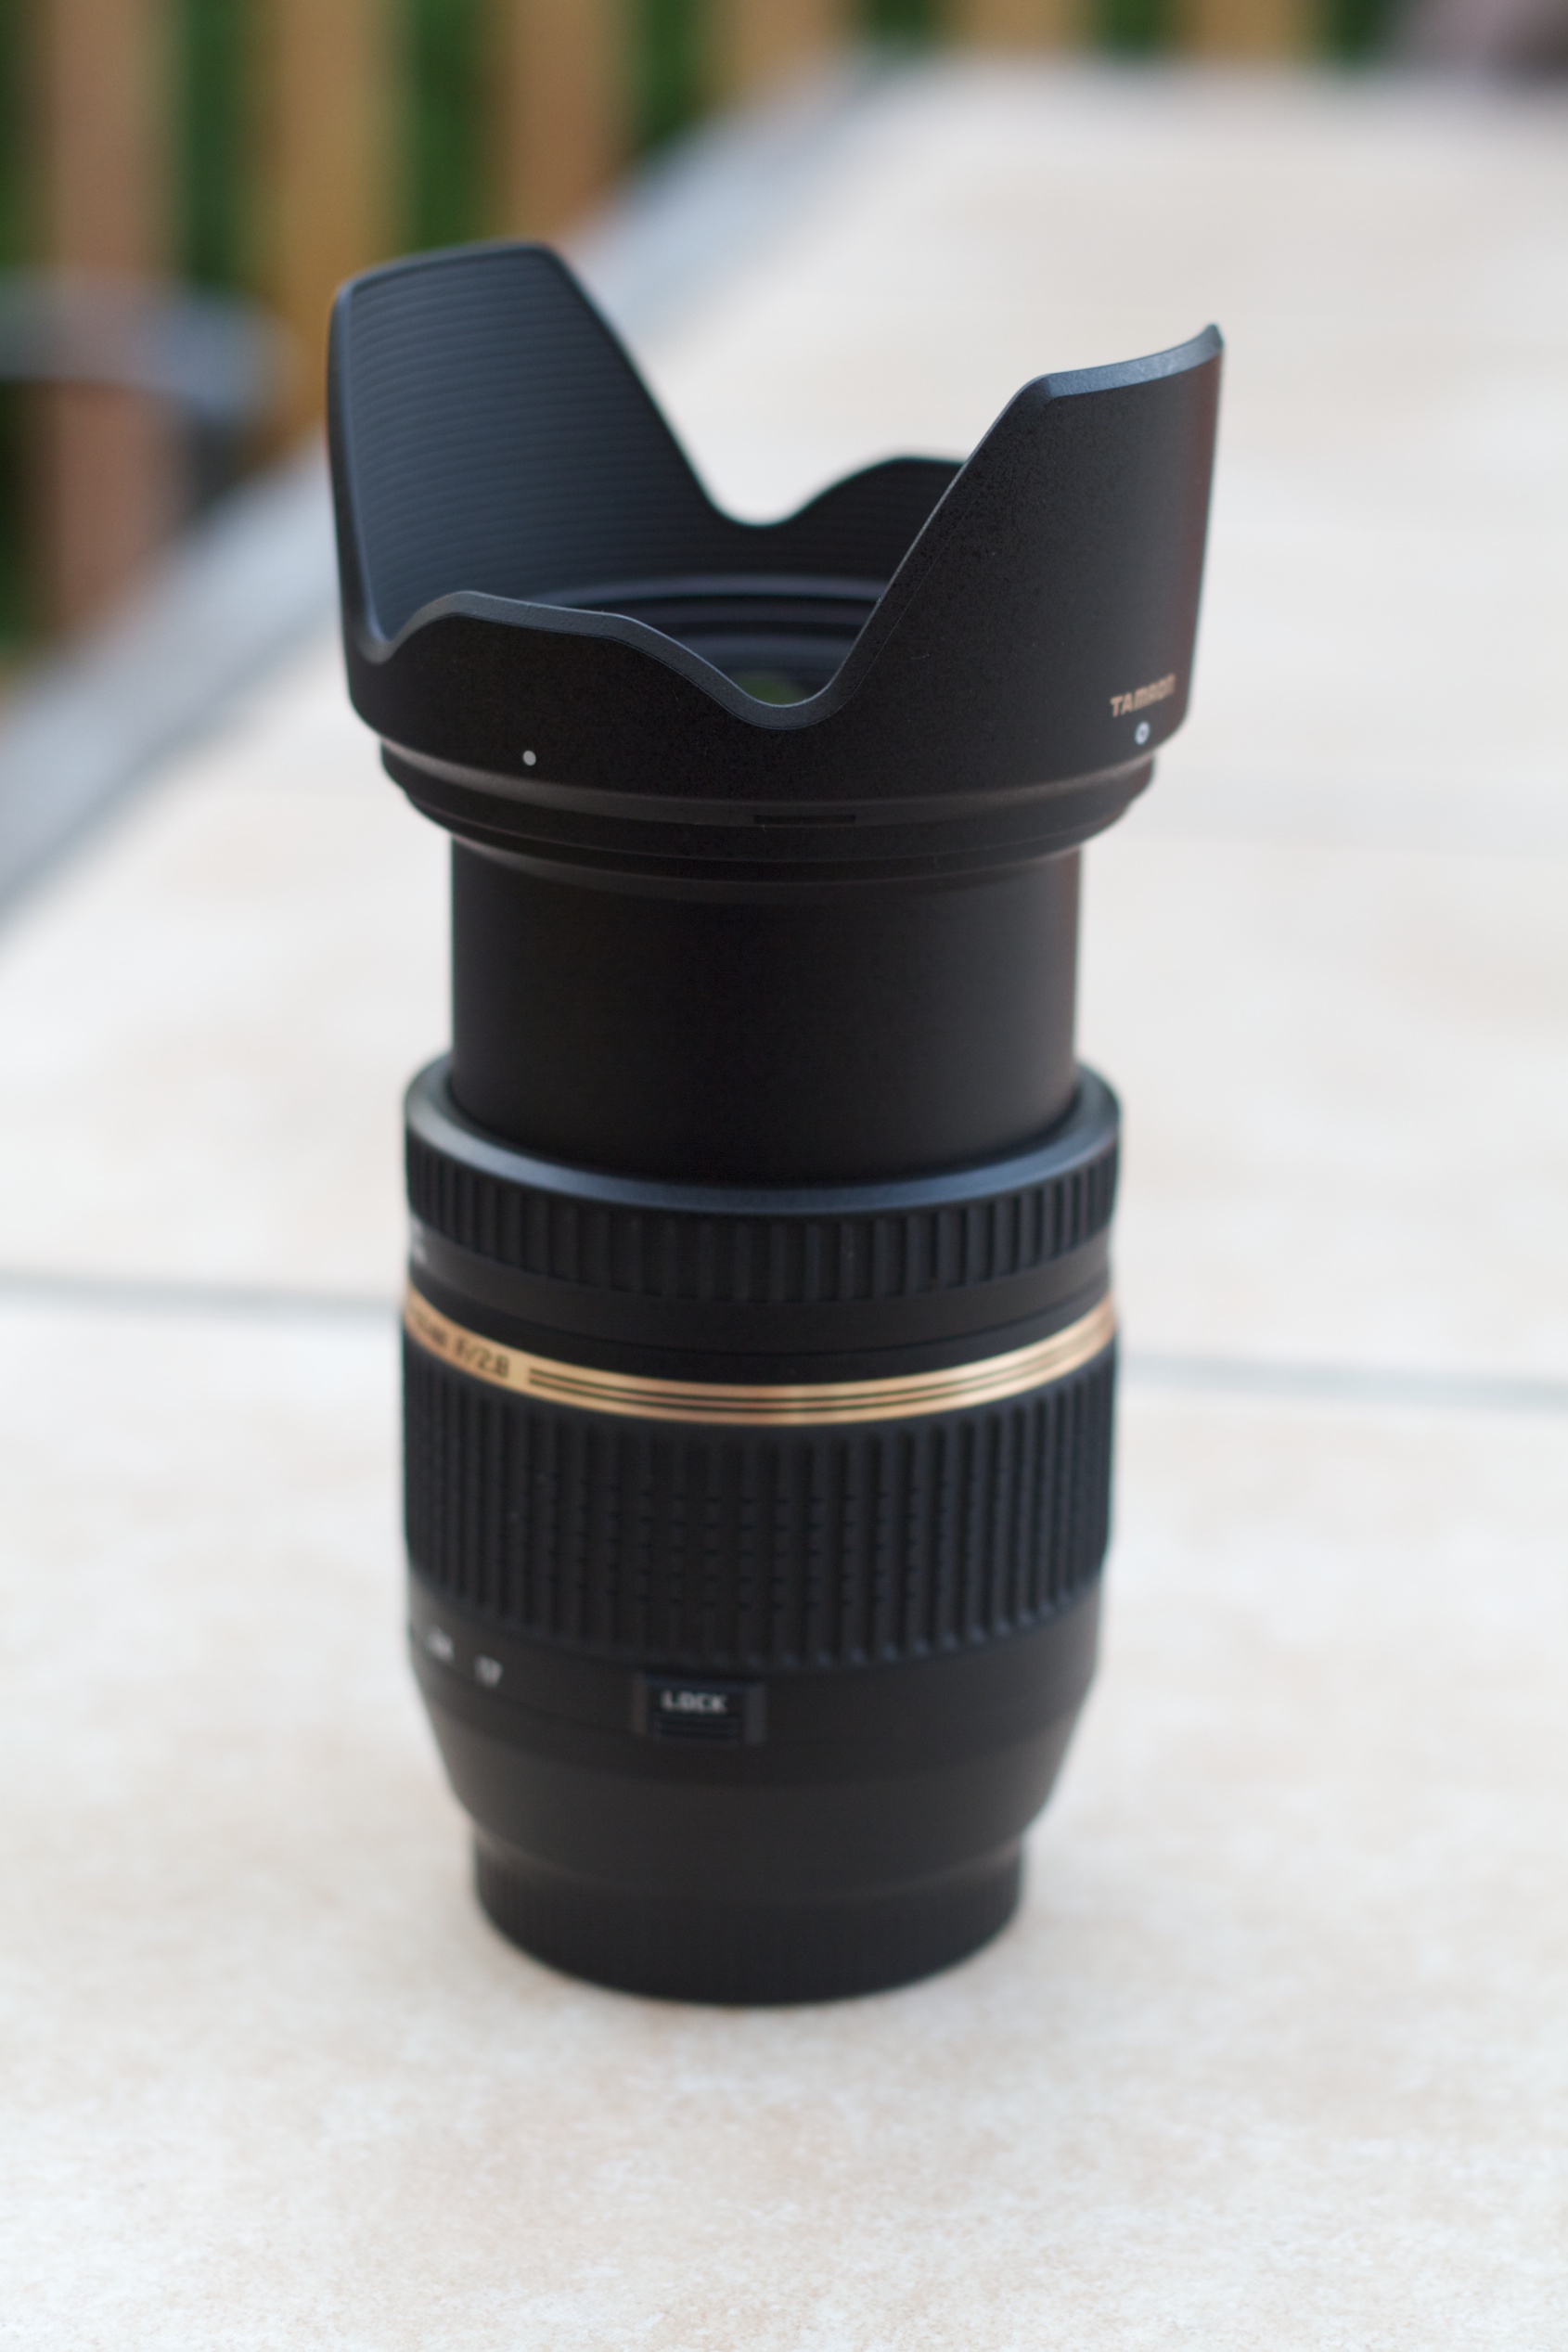
The build quality is very nice. The only issue I had was that it made a noise when it adjusted the zoom. The camera guy said this would go away over time and it is already not a loud as when I first tried the lens. It has not gone completely away yet. The controls make sense although the focus ring goes the opposite direction. This is not a problem when using the auto focus mode, but can create issues when you are manually adjusting the focus in video mode on the Canon 7D. The lens comes with a hood which is nice because Canon lenses don’t seem to. The lens is not too heavy and feels great mounted to the Canon 7D.


Using the lens
The Tamron 17-50mm f2.8 VC lens feels great on my Canon 7D. The connection is solid and the focus ring moves smoothly. As noted before the zoom ring is still a little stiff but is starting to feel better.
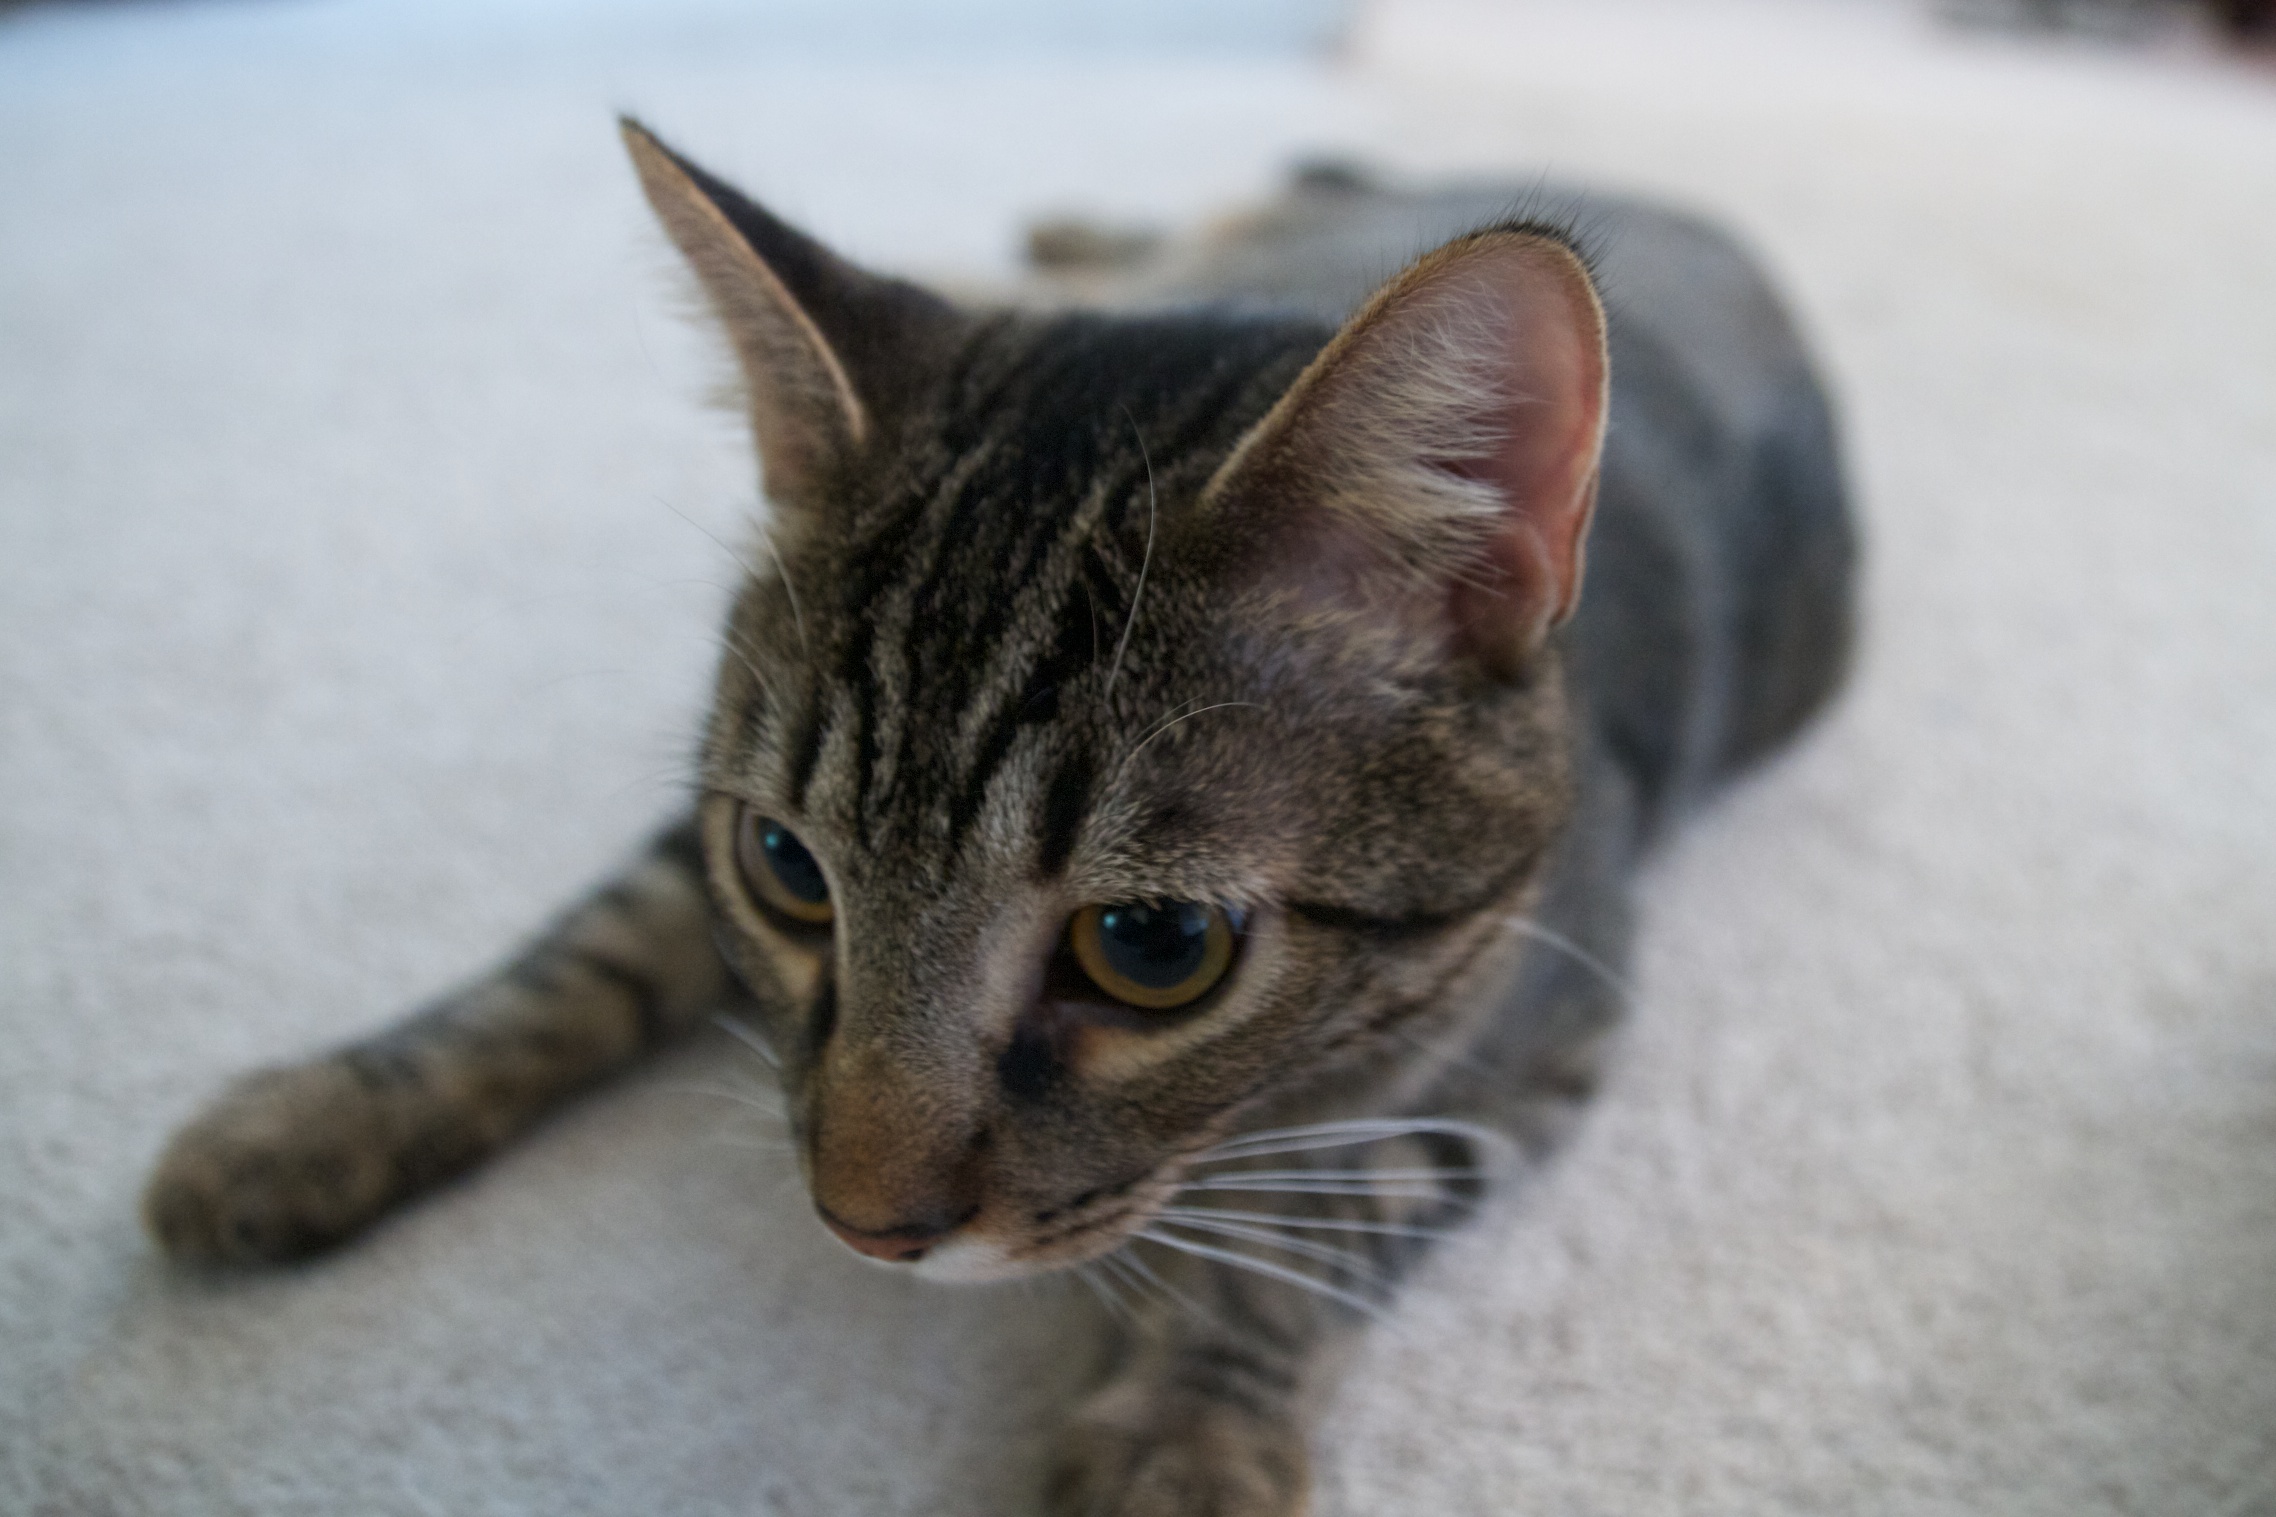
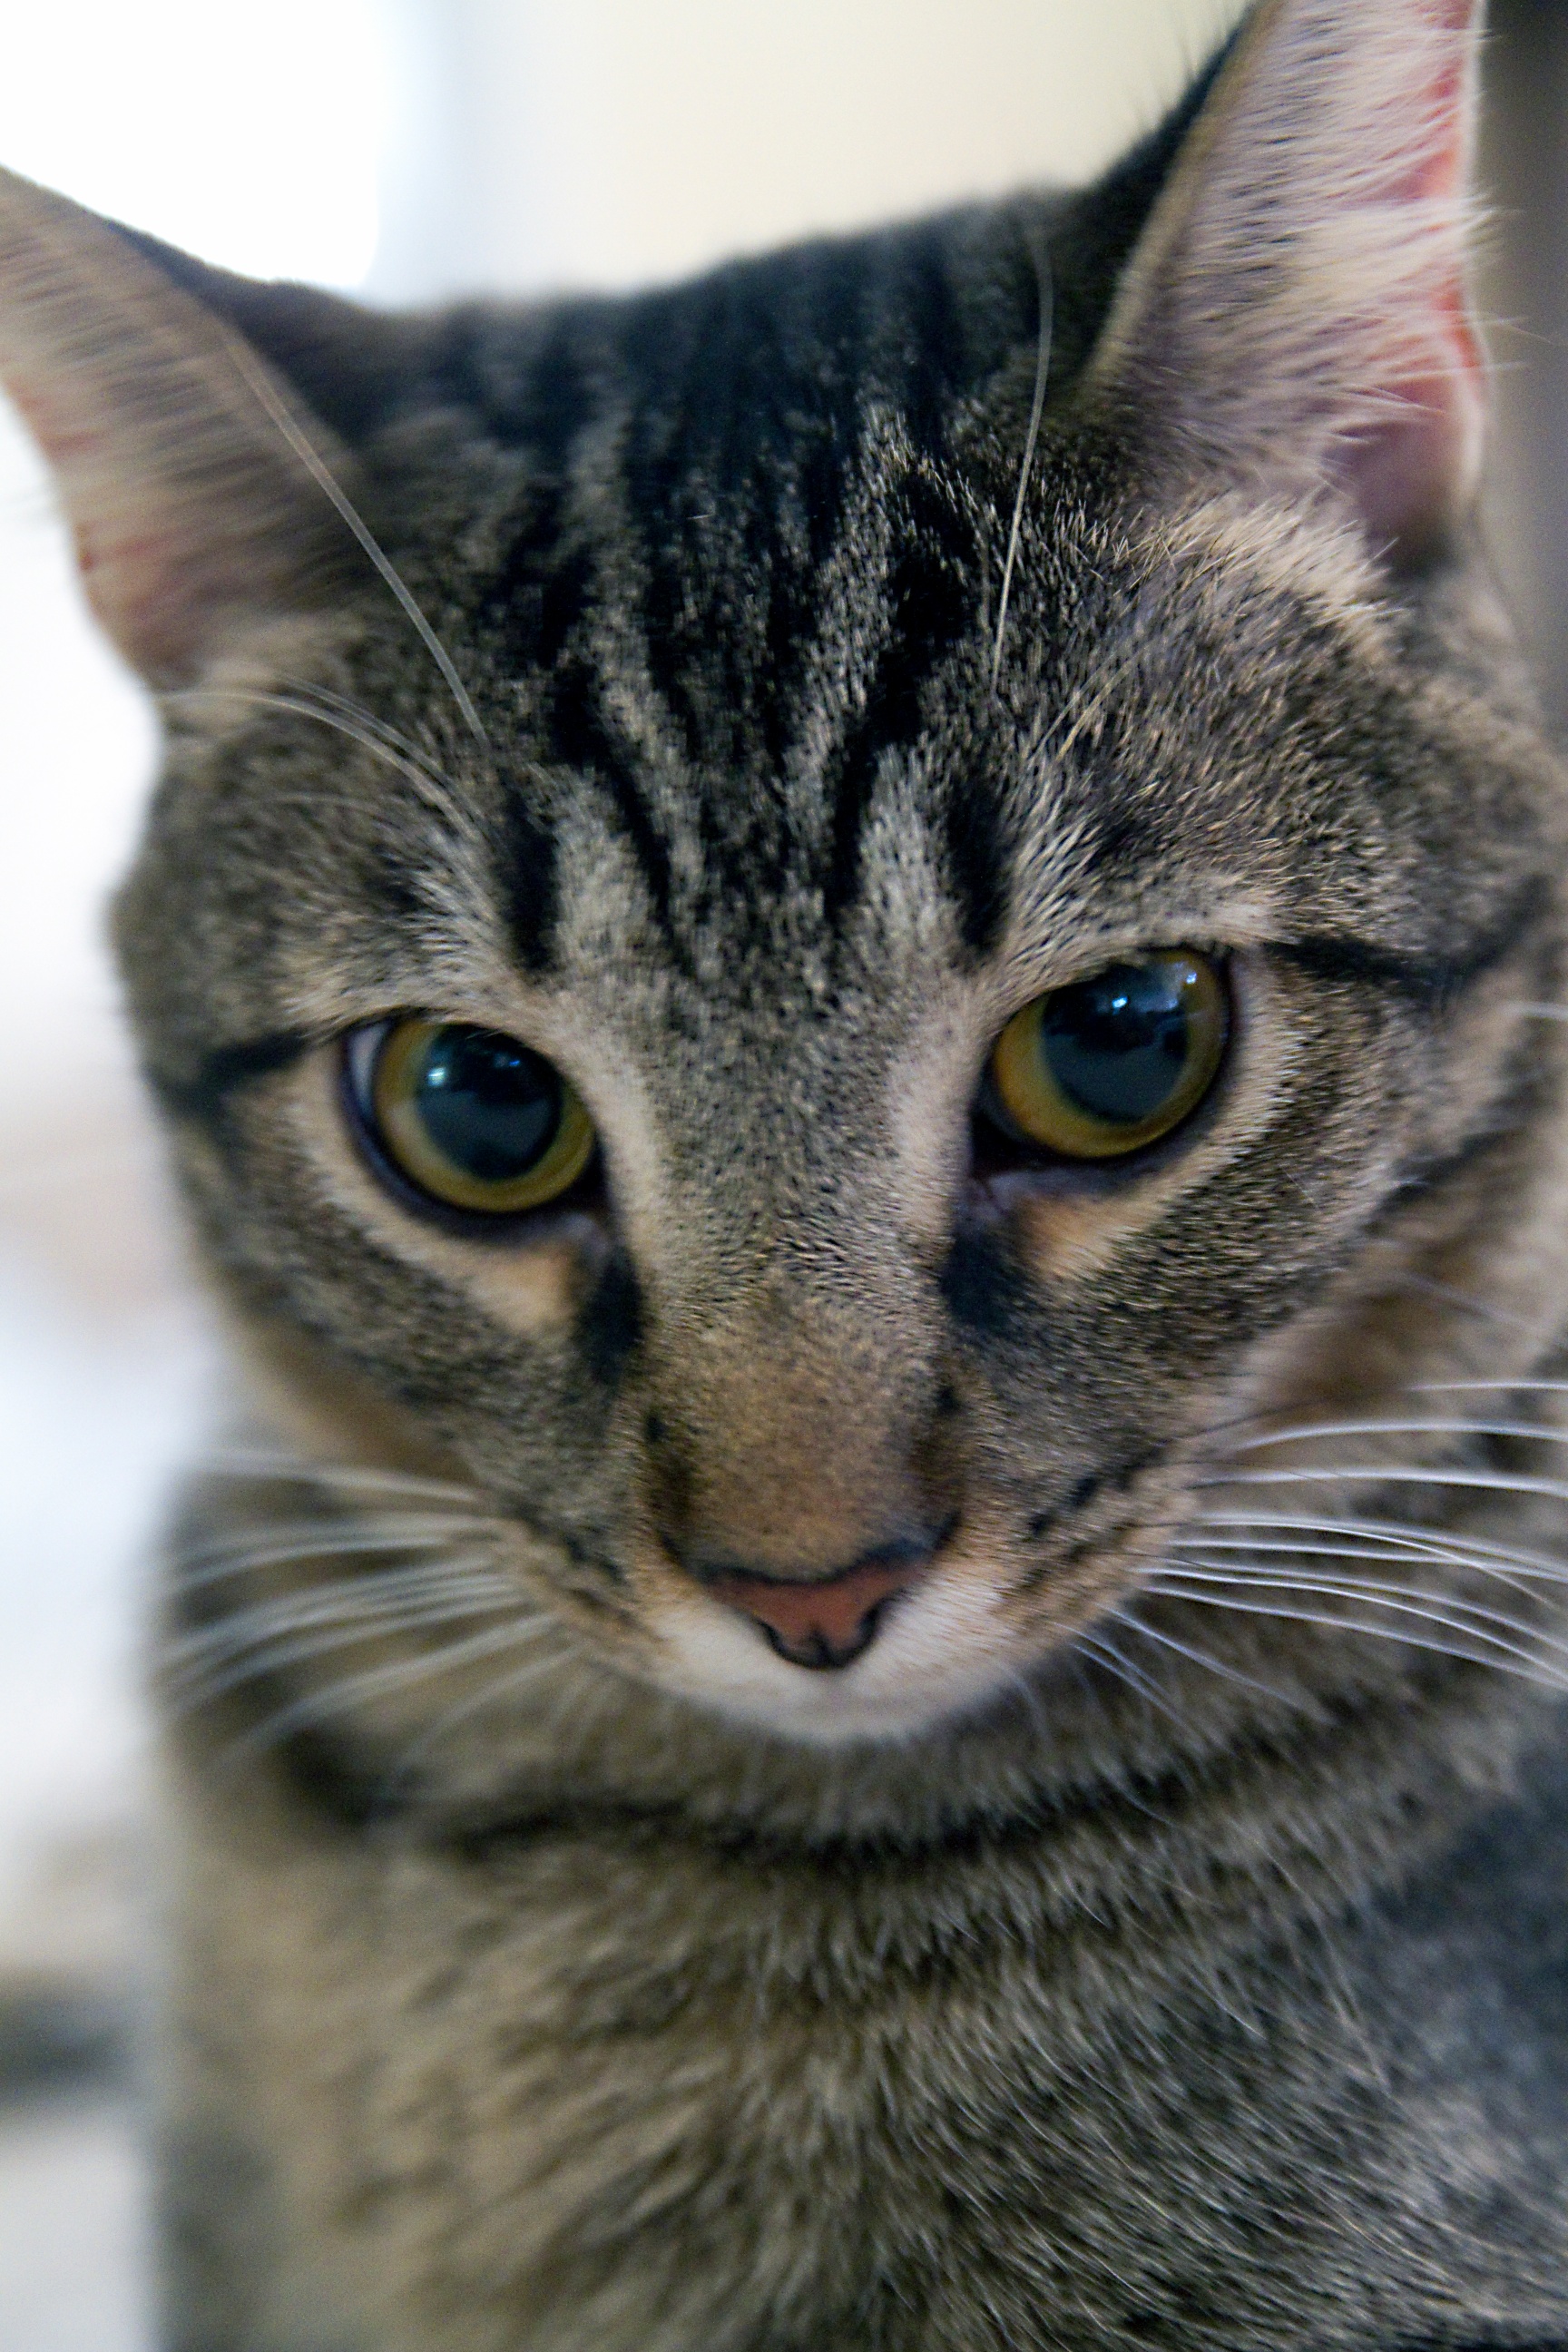
My first test using the lens was in my bedroom in the morning. Our curious cat Shadow (gray cat) was my first subject. The first thing I noticed is that the auto focus was noisier than my Canon lenses. Actually, it was on par with my Sigma lens. Auto focus works quite well and is relatively quick. I was able to get a great picture of my “moving” subject. When comparing this lens to the others, I notice that the minimum focal length is really close. Specs reported 11.4″ but it seamed closer. This allowed me to get really close to my subject and product a nice DOF.
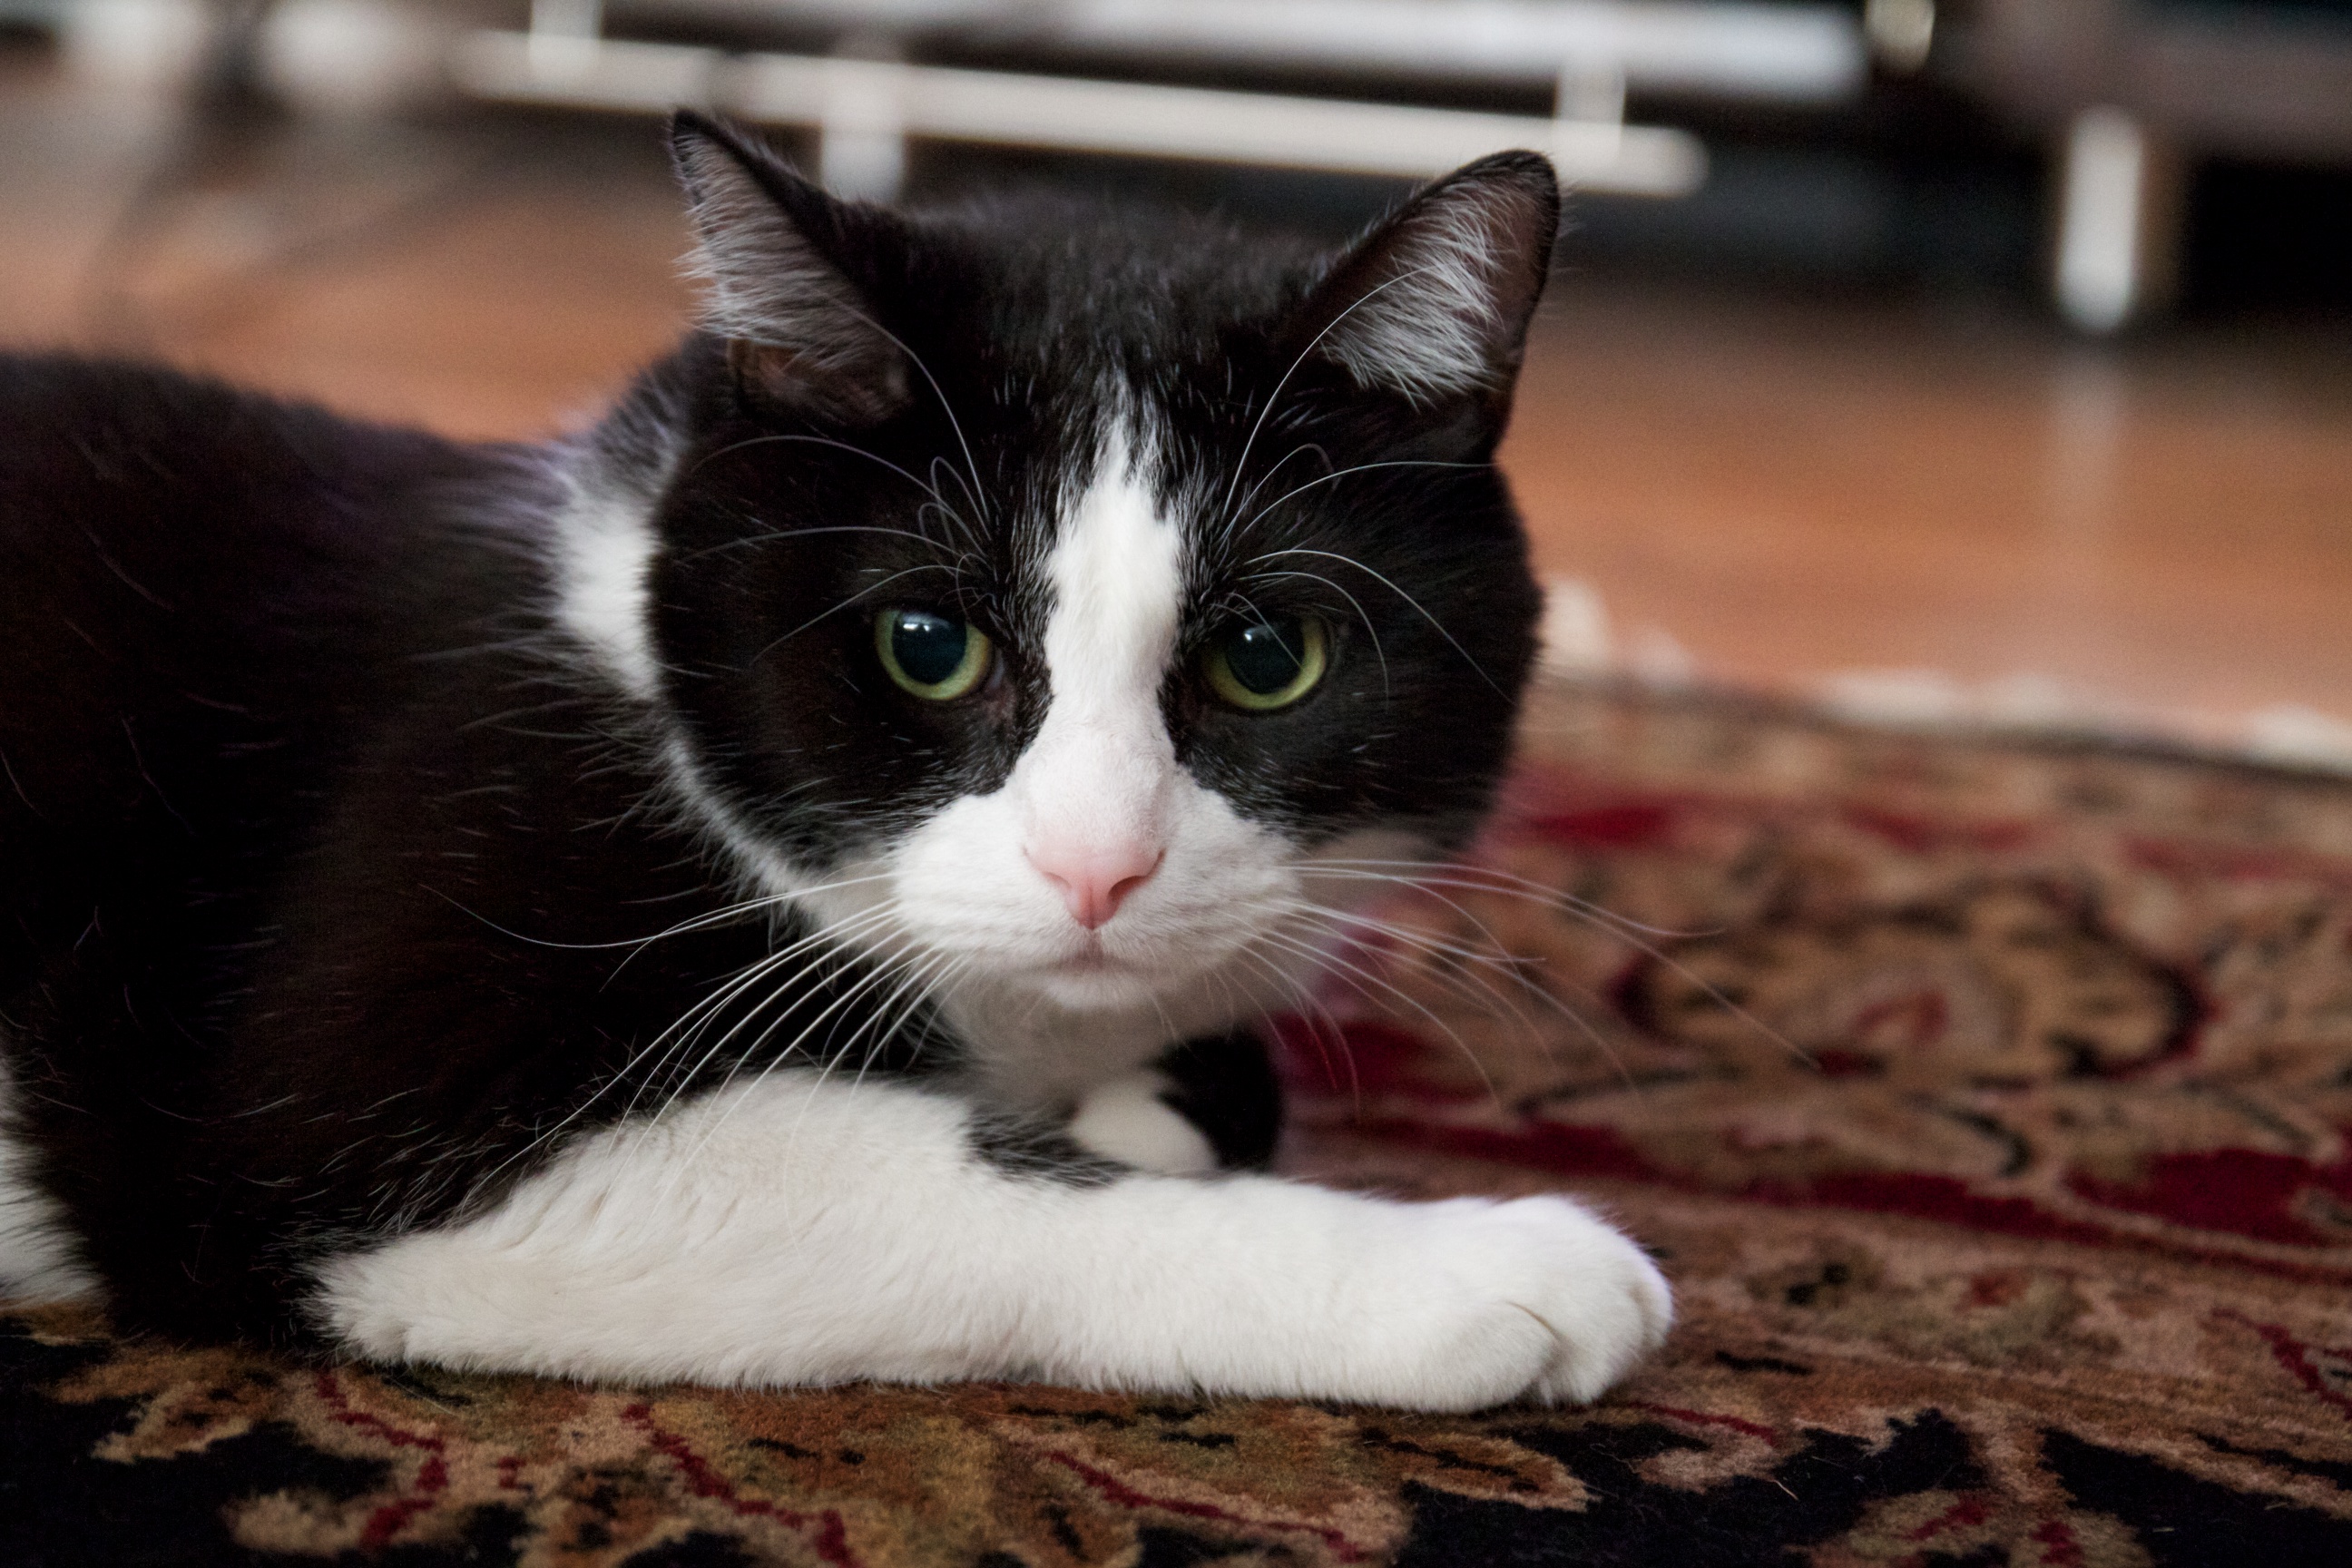
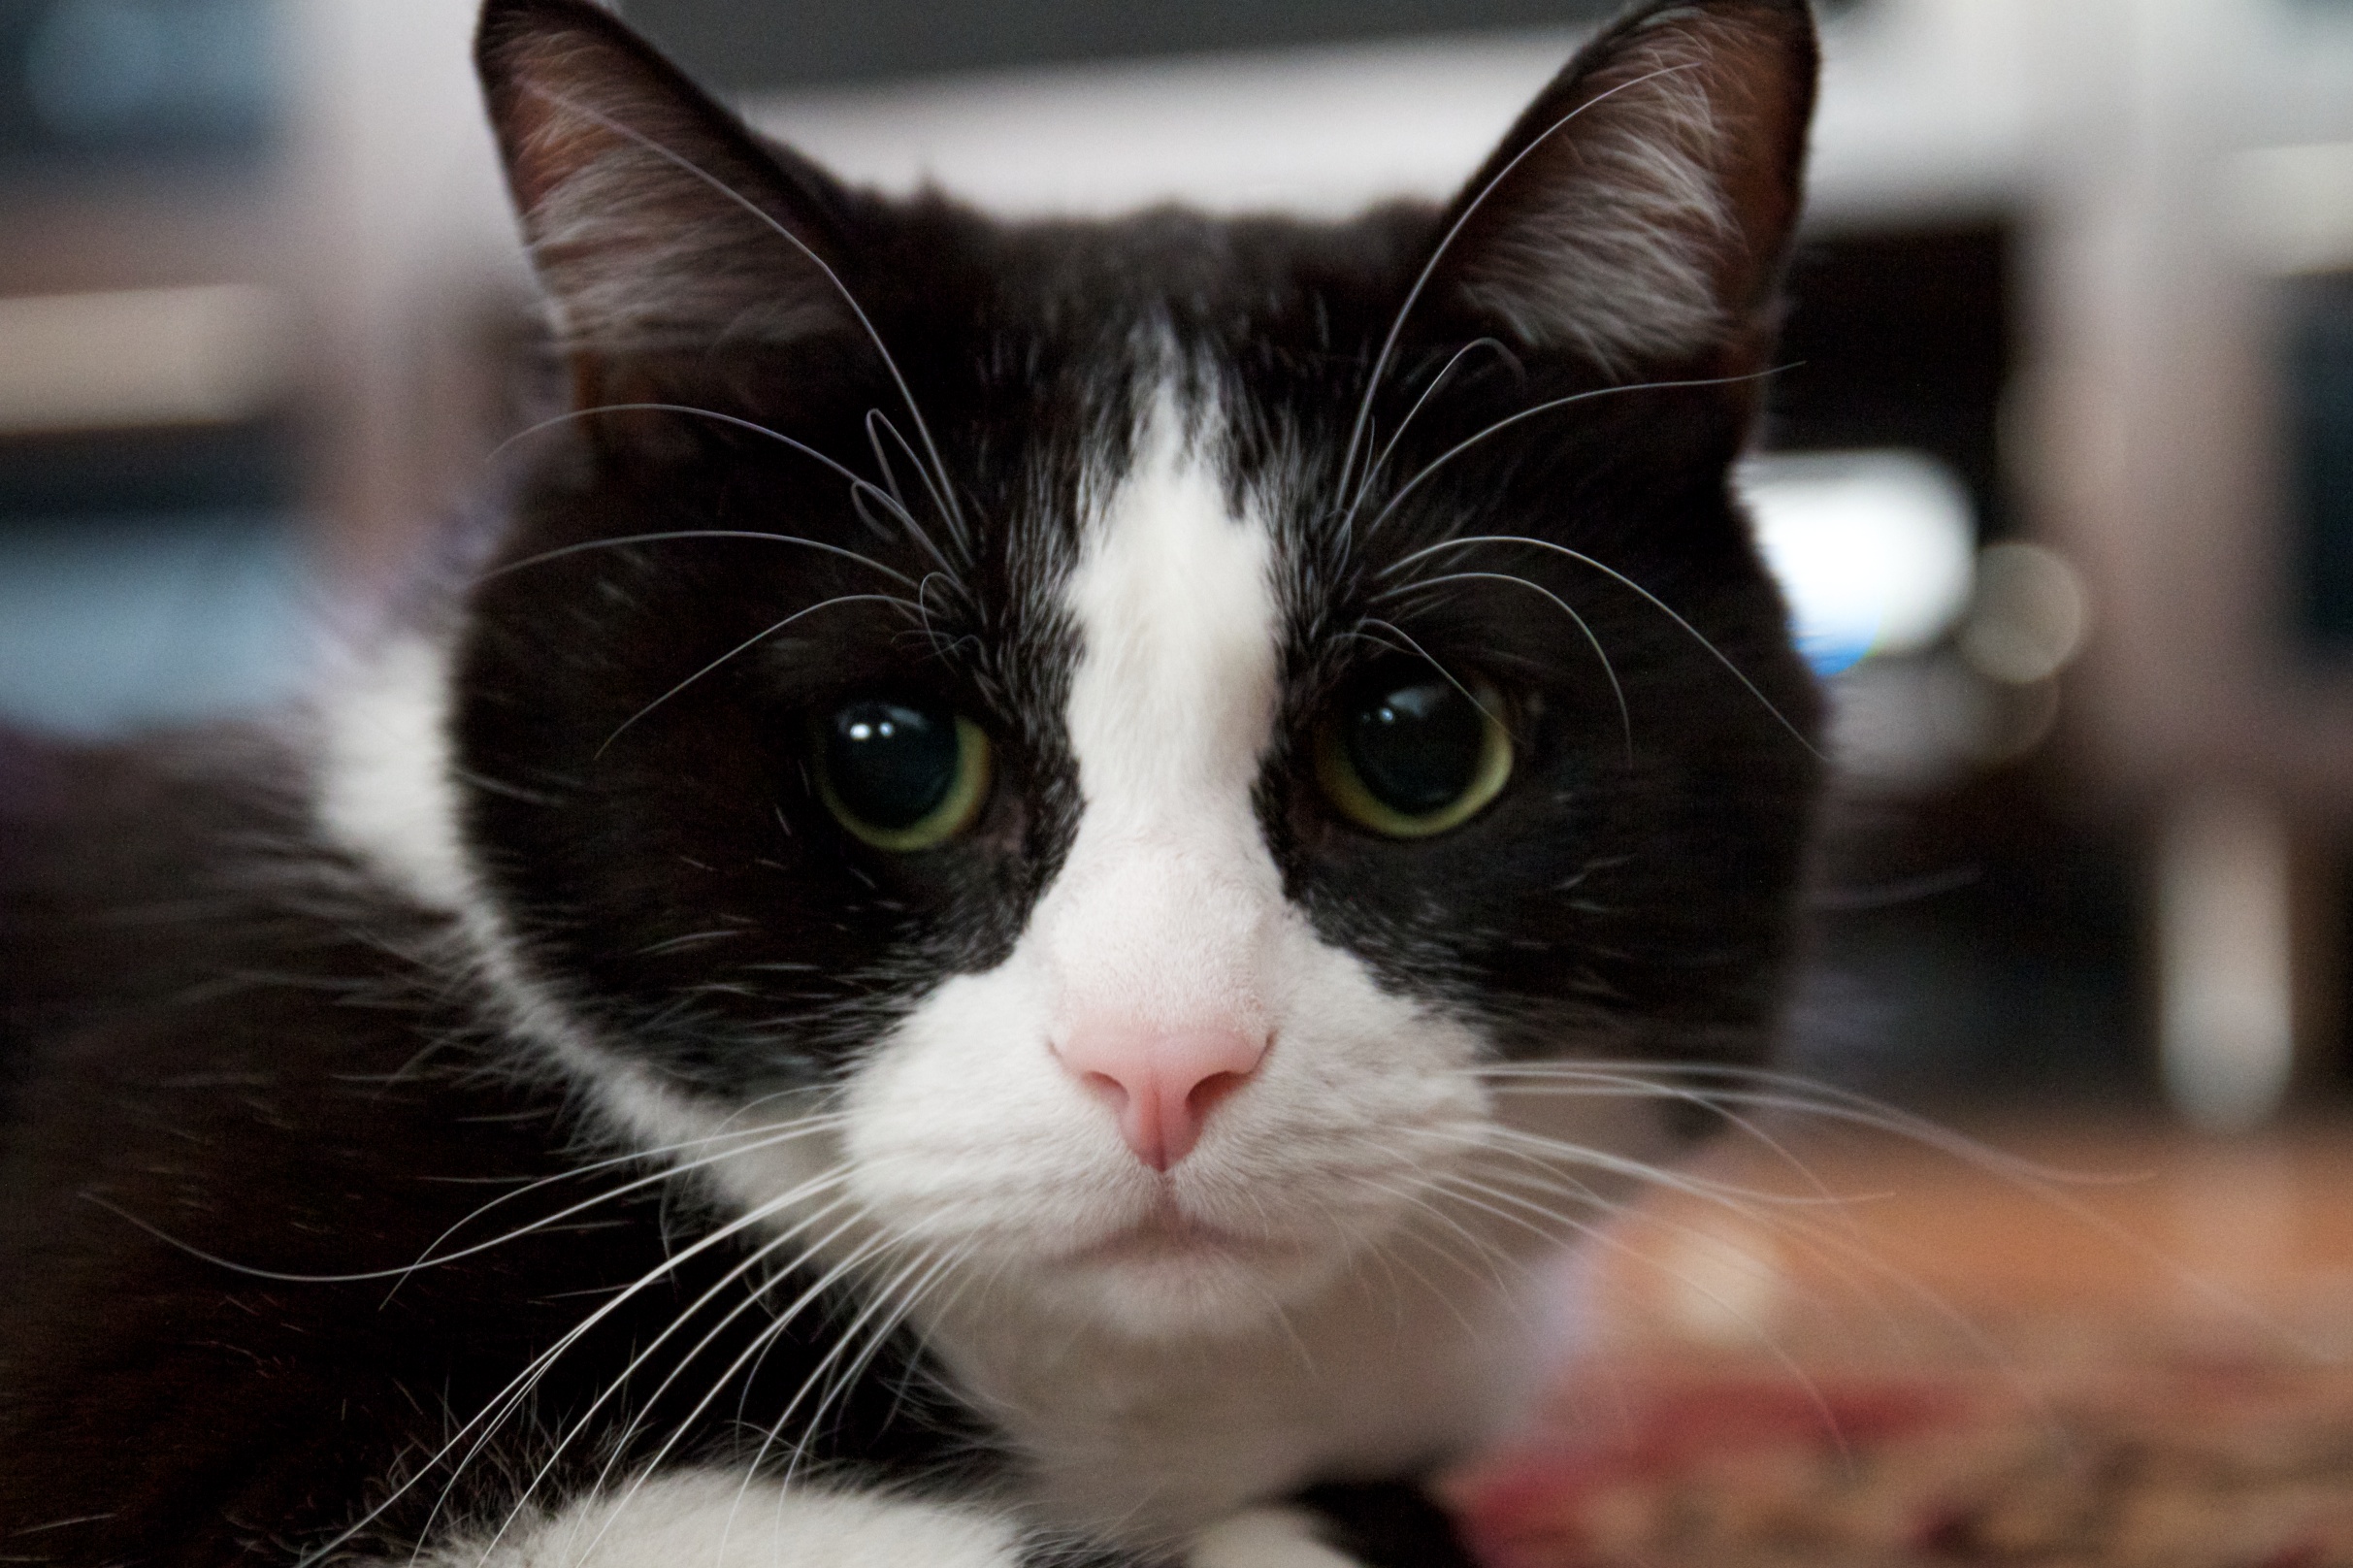
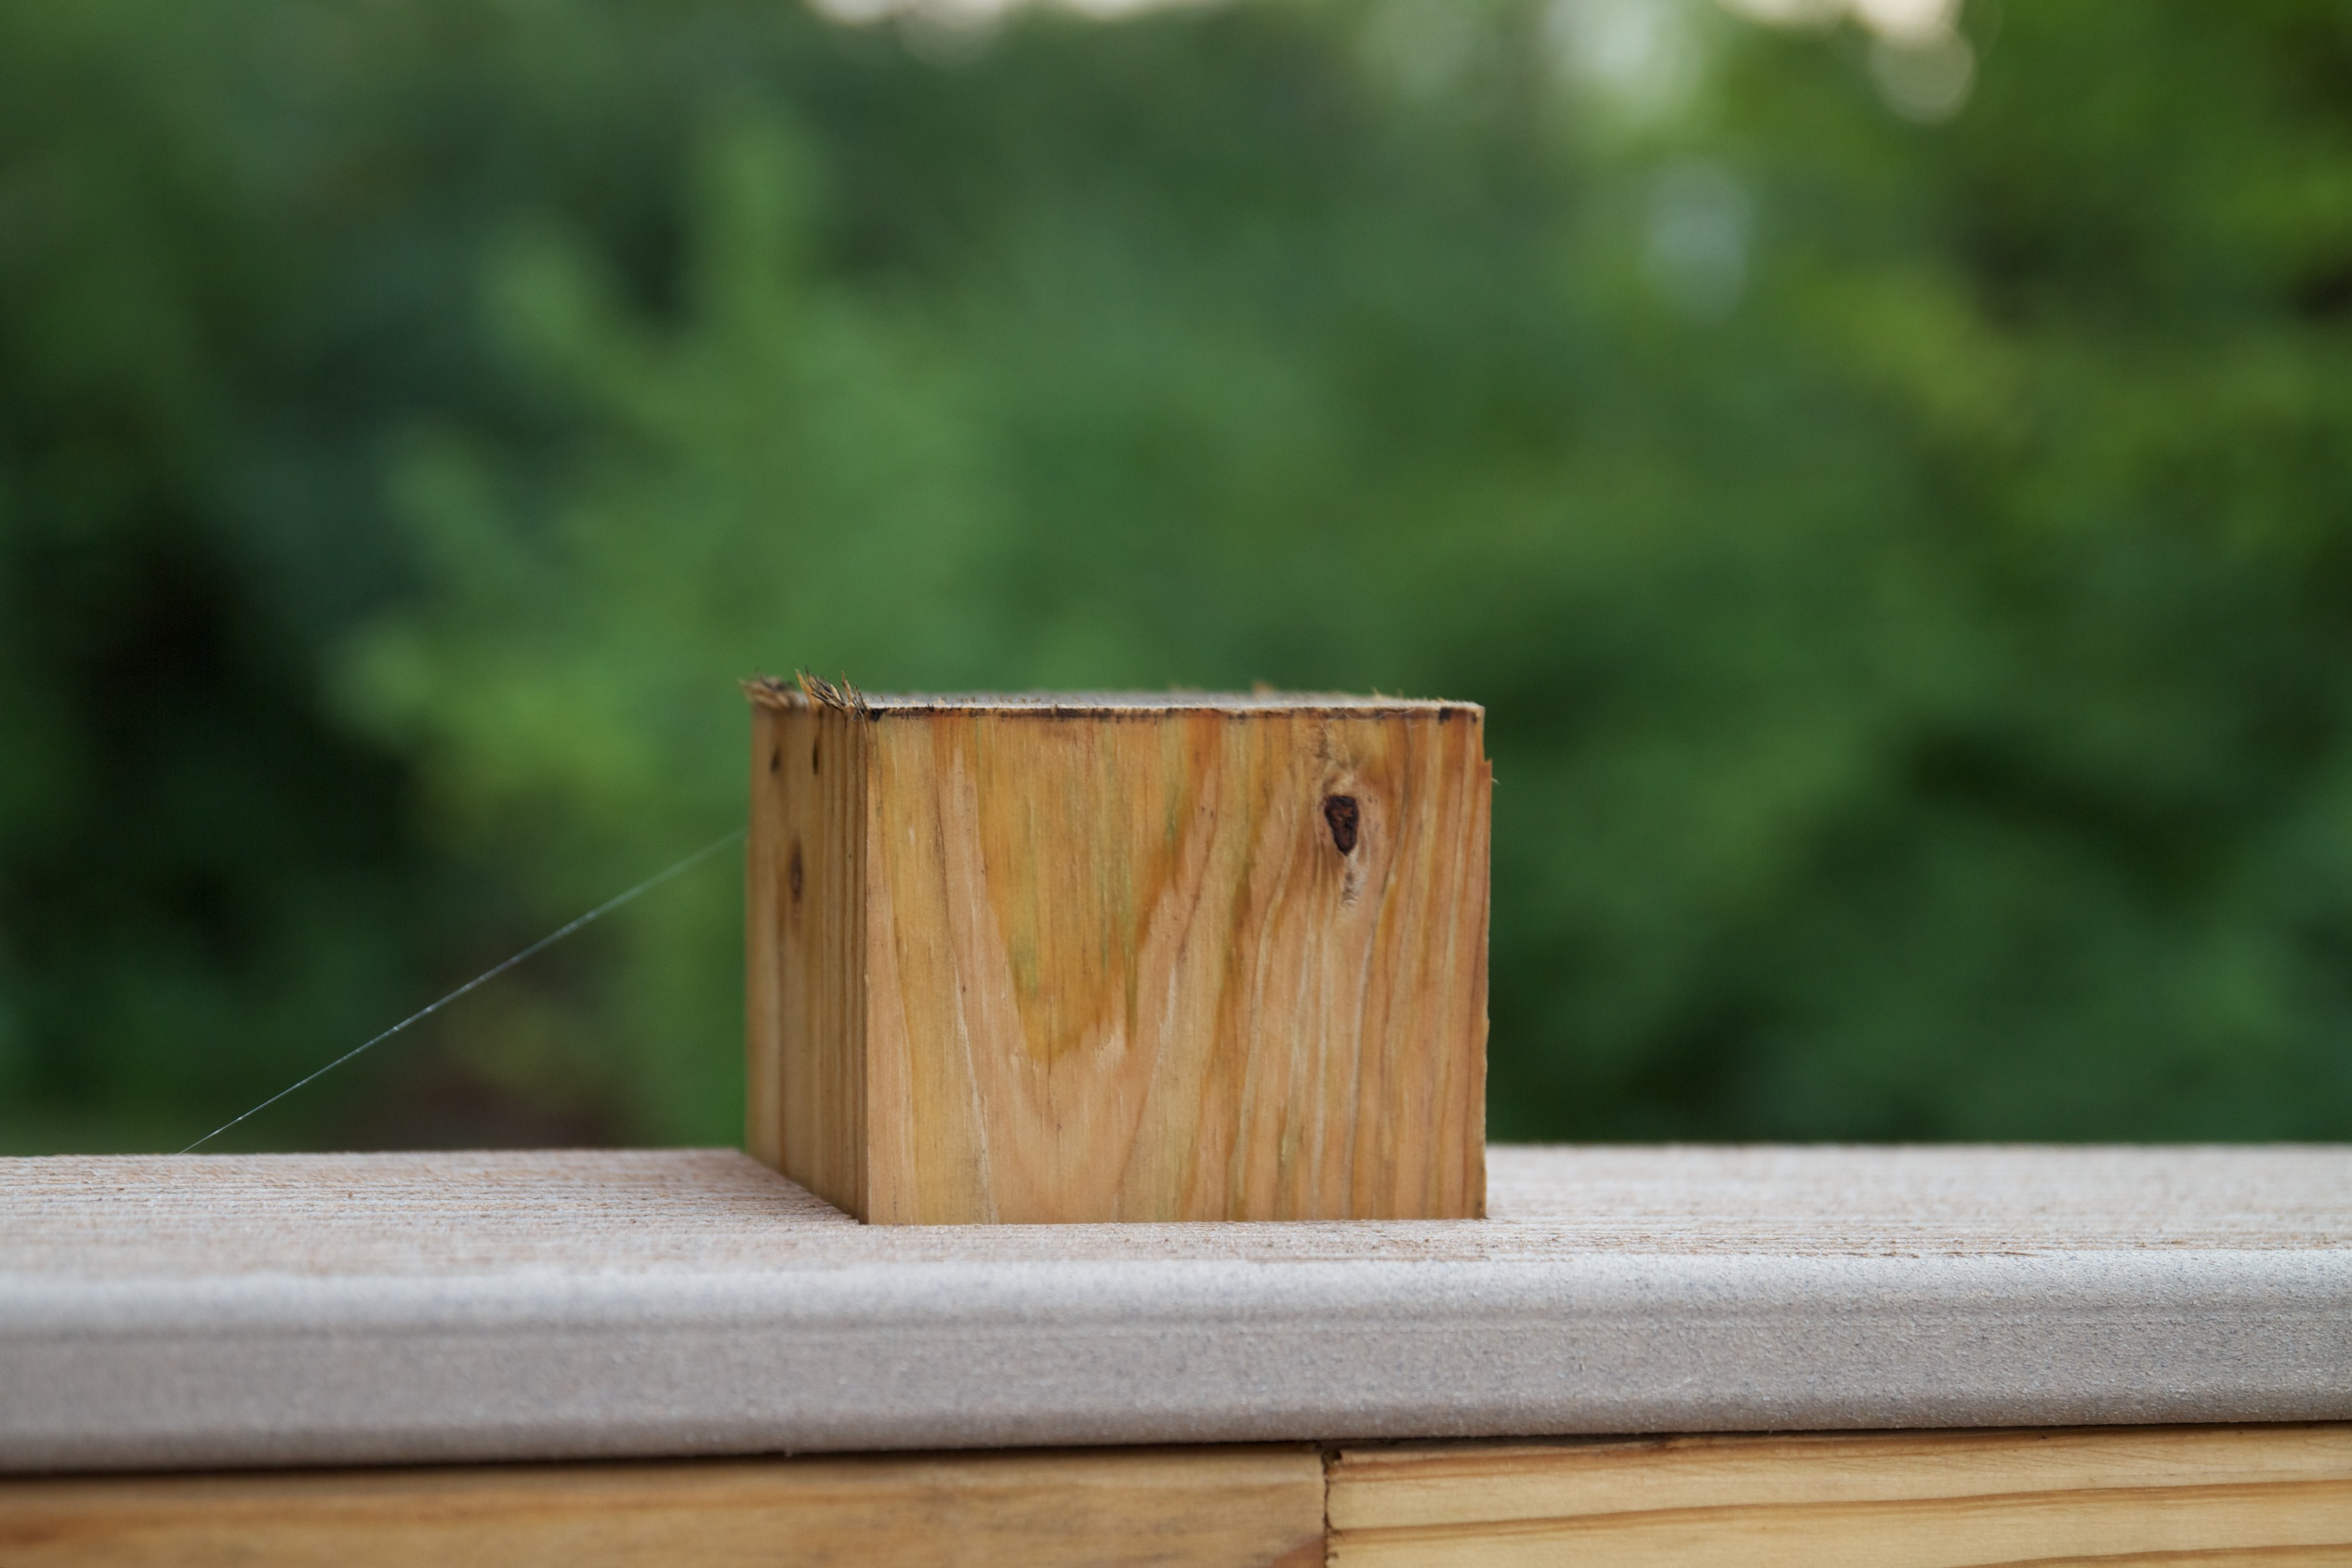
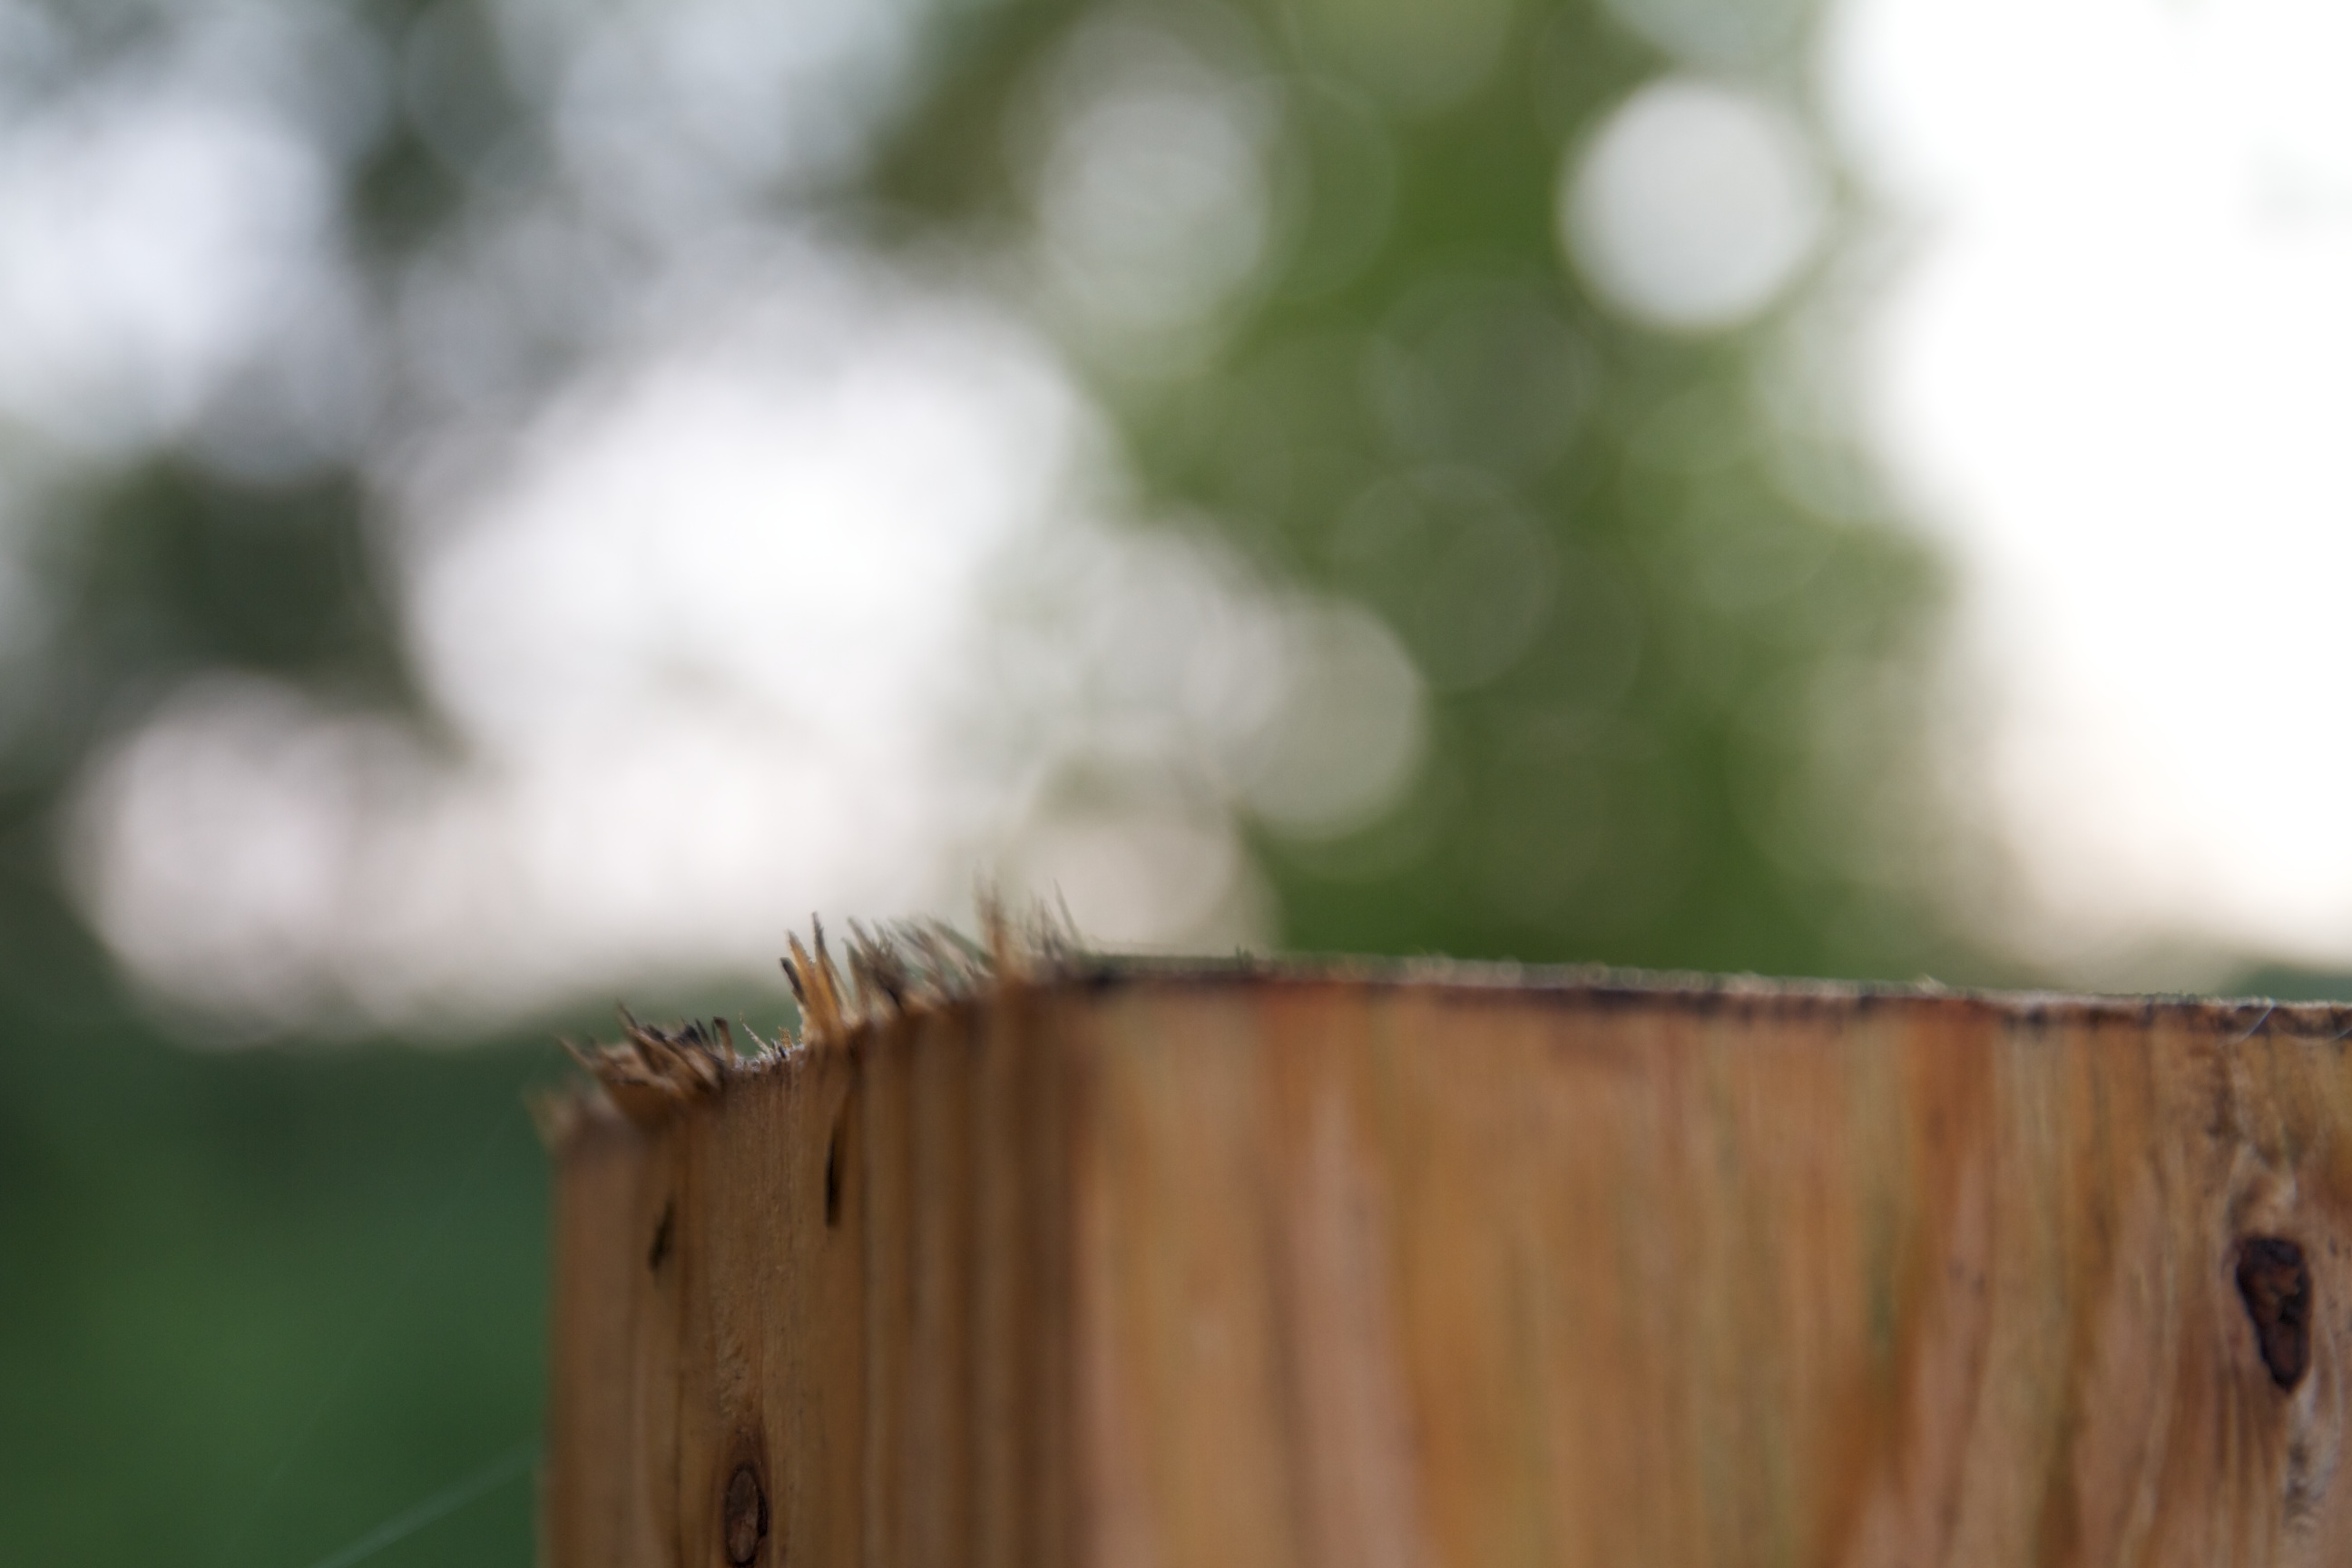
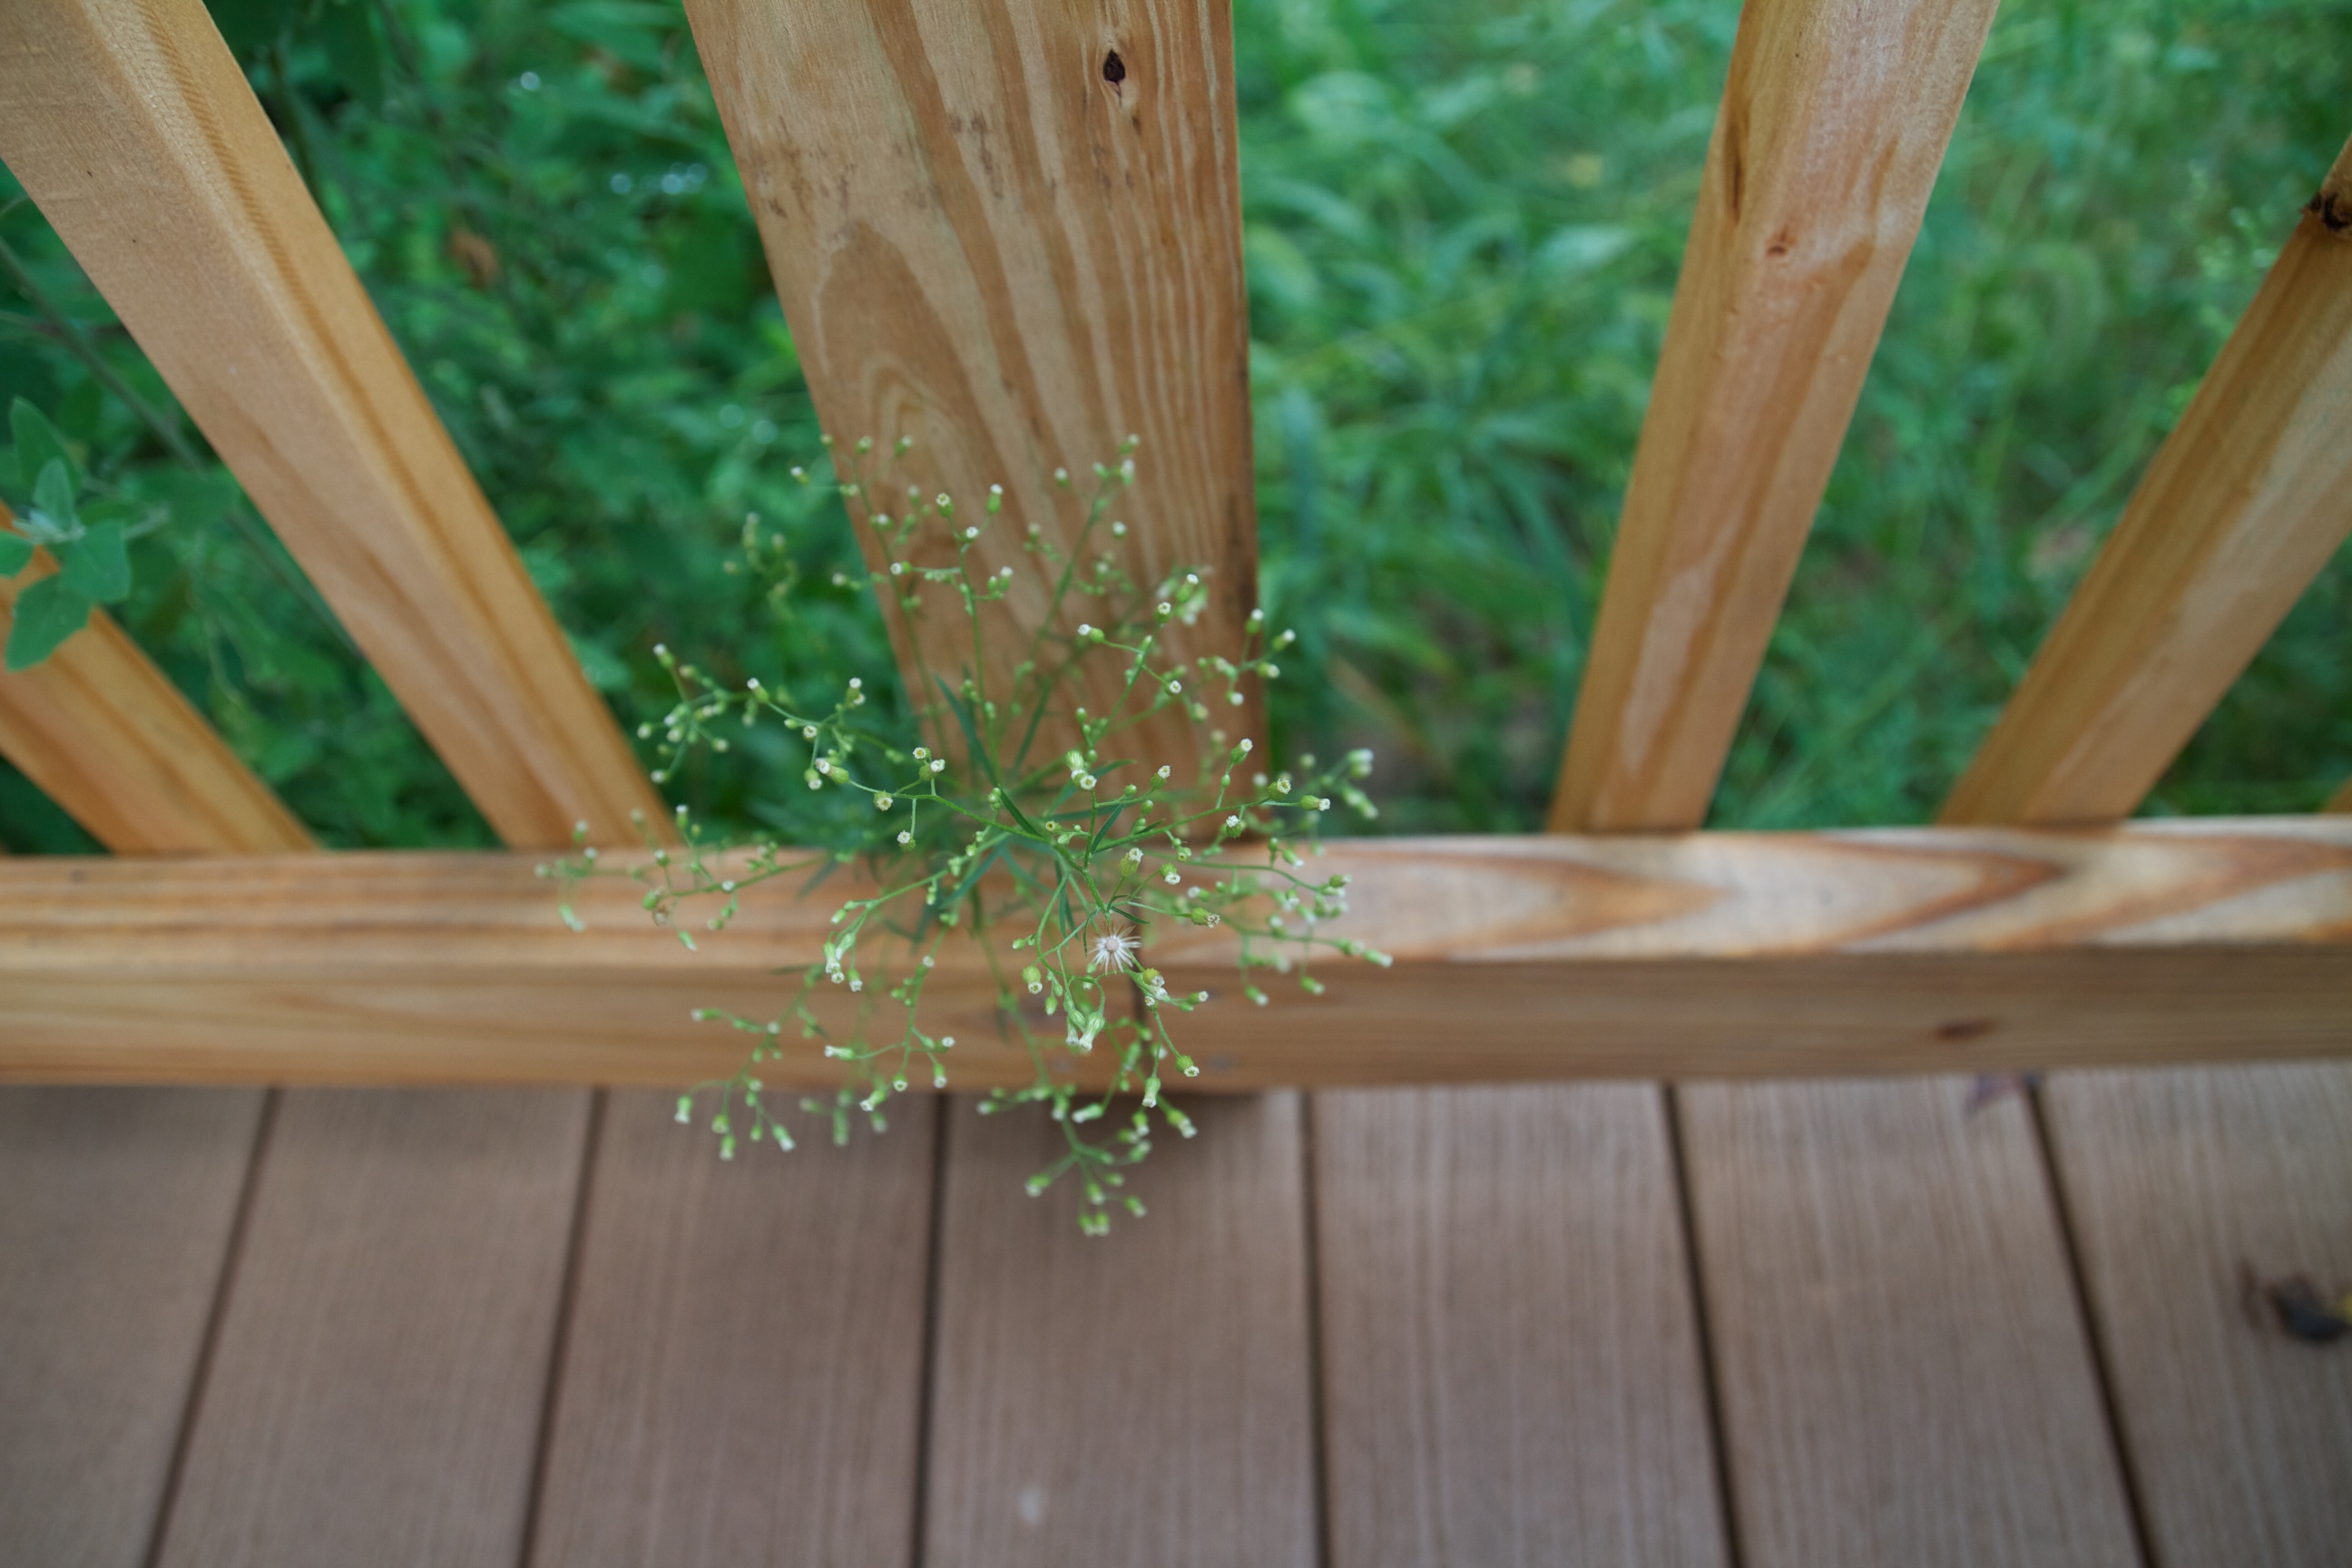
Later, I compared taking pictures with my Canon 50mm f1.8 lens. To be fair, I set the Tamron to a 50mm zoom setting. I found the autofocus in the Tamron to be slightly more accurate but the Canon lens was much faster. I noticed that I could get significantly closer to the subject with the Tamron 17-50 versus the Canon 50mm f1.8. (black and white cat) Outside, I took some pictures of my deck railing. I was able to easily control the depth of field getting a really nice blokeh.
Finally, I decided to shoot some video. My daughters friend was performing down at the local Applebee’s. I used my Zoom H4n for the audio and did a quick edit in Final Cut Express. (I can’t wait to get Final Cut Pro) I was a little off in the focus (I need a better way to focus) but the color looks just like it did at the event.
Conclusion
The Tamron 17-50mm f2.8 VC lens is a great addition to my collection. For the moment, this lens has displaced my Canon 50mm f1.8 and the default lens mounted on my Canon 7D. What the Tamron gives up in speed, it makes up and more in the ability to get closer to a subject and zoom out to a wide 17mm range. This lens is a great fit for someone looking to add a multipurpose lens for video and picture for your Canon 7D (or T2i/550D).

Digital Workflow – How to share your 7D pictures and video
May 2nd
Now that you have taken those great pictures and video. The next step is how to get them from your Canon 7D to your friends and family. That’s right, we are talking digital workflow. Wikipedia describes workflow as a “sequence of connected steps”. Here is the steps I used starting out with a couple of options based on cost.
Memory Card
This is where it all starts. Currently, I am using two 16GB 133x cards. I also have a 4GB 133x card as a backup. While these cards are not the fastest, they are plenty fast for shooting video. I paid about $40 a card on Amazon.

Memory Card Reader – Getting the files from your 7D to your Computer
Some PC computers will have a build-in card reader that will take your CF cards. Most laptops will not. When I was using a PC laptop, I had a PCM-CIA CF card reader that fit flush in the laptop. That worked well. When I upgraded to a Macbook Pro, there was no card reader at all. (The new ones have a SD card reader) I guess you could use the 7D to transfer the files directly, but that would waste battery power and you really couldn’t use the camera during the transfer.
Remember NOT ALL CARD READERS ARE THE SAME. Just because it says USB 2.0 doesn’t mean it has a fast transfer rate. I have multi-card readers and I found something interesting. Both are USB 2.0 but one is significantly faster than the other. When choosing a card reader, try to see if they publish transfer rates. Currently, I am using a card reader I bought at Microcenter. However, I plan to upgrade to a Lexar CompactFlash FireWire 800 Card Reader.

Computer
This is personal preference. Today, I am using a Mac. However, there are some very good PCs out there too. Macs do cost more upfront for the hardware, but I find that in the long run, they are a better investment. One of the advantages of a Mac is the built-in software. All new Macs come with iLife. iLife has a iPhoto for picture editing and organization and iMovie for movie editing. For the price of just the Mac, you are already capable of product great photos and videos with your Canon 7D.
Where to store your files
One of the big challenges for me is where to store my Canon 7D files. The 7D produces great pictures and video at the expense of file size. A RAW photo at the highest resolution will consume about 24MB of storage space. A 12 minute video will eat of 4GB of space. It is easy to see that this will quickly fill up your hard drive on your computer. Here you have a couple of options. You can install a bigger hard drive in your computer. If you have a desktop PC, this is a simple good solution. On a laptop you usually top out around 500GB. I can tell you that this is not enough for a big project. For this reason, I recommend keeping your files on external drives.
External hard drives are cheap. At this moment, I have two portable external drives (500GB and 1TB) and a larger 1.5TB 3.5″ drive to back up my portable drives. (I also have a 1TB drive that is use to backup my laptop) I cannot stress this enough… BACK UP YOUR DATA. You can’t have too many backups. If you lose your pictures or videos, you can’t get them back. Your memories will be lost forever. So please, back up your data.

Organize your pictures and videos
If you are using a Mac, you can import your pictures and videos off the Canon 7D directly into iPhoto. You can do this with an external drive by placing your iPhoto library on that drive. From there you can use the iPhoto software to organize your photos into events and albums. I recently upgraded to Aperture 3. I actually use a two stage process. First, I import my files onto my external drive. Then I do a quick look at the files using Adobe Bridge. During the quick look, I delete any out of focus, or unwanted pictures or videos. I find with the Canon 7D, most of the pictures are in Focus so it is more of an artistic filtering (closed eyes, funny looks, etc.) Then I import the pictures and videos into Aperture with tags, copyright stuff and event information.
Edit your pictures
On a Mac, a simple solution is to use iPhoto. I have used iPhoto to edit photos with good success. The editing capability of Aperture is even better. Another option that works on both a Mac and PC is Adobe Photoshop and Photoshop Elements. For the cost conscious, Photoshop Elements is usually bundled with Premiere Elements (video editor) for around $150 bucks. For PC users this is the best solution for the money. You will be impressed with the high-quality results you can get using the lite version. For serious photographers, I would recommend using Adobe’s Lightroom and Photoshop. Lightroom is available on both Mac and PC and is a direct competitor to Aperture. For more advanced photo editing, Adobe’s Photoshop has no equal. If I am printing a photo, I will usually do tweaking in Photoshop.
Photoshop is expensive. However, if you are a student or work at a university, you can get the educational discount which is huge. Also most university stores will have the software available at the discounted rate.
Edit your videos
On a Mac, iMovie is a great basic video editor. I have found I can produce great results. For more editing capabilities, upgrade to Final Cut express. Both iMovie and Final Cut Express have a limitation. They will not edit video in 24p (24 progressive frames per second) that gives you that cinema look. They only way to get that is to use Final Cut Pro or Adobe Premiere Pro (pretty sure that Premiere Pro edits in 24P). On a PC there are several options. Premier Pro is one standard. There are other programs that people like on the PC, but I have not used them.
Share your pictures and video
For sharing pictures, I use Flickr. F It has direct integration with iPhoto and Aperture. There is also great plug-ins and programs to help mass uploads. If you plan to share many photos, I would recommend upgrading to the Pro account. It is relatively inexpensive $25 a year for unlimited uploads and the ability to group photos in many different sets and collections. For video, the two I use are YouTube and Vimeo. Please check out my article comparing the two services for more information. YouTube vs. Vimeo
Conclusion
This post was supposed to be quick, but when writing this I realized there is a ton of things to decide when taking, processing and sharing your work. I hope this article sheds some light on the subject. Please let me know what you think.


First Look – Zoom H4n
Apr 21st
If you are like me, you realize that the video quality of the Canon 7D is amazing. Not so amazing is the sound. The Canon 7D has an integrated mono microphone. It also has a mini-jack stereo input. However, both are controlled by an auto gain feature that is not user adjustable. The internal microphone works OK, but is that good enough to match the video quality? Fortunately, there are solutions.
For the Canon 7D you have two basic choices. You can add an external microphone designed to plug in to the 7D, or you can go with an external audio recorder. I decided to go the external recorder solution and chose the Zoom H4n.

The Zoom H4n is a 4-track external audio recording device. It records on to SD cards with super high-end audio. It has two on-board microphones that can be user adjusted 90˚ or 120˚. It also has two phantom powered microphone inputs for 4-channel audio recording. You can pick up a Zoom H4n for about $300.
I have been playing with the H4n for a couple of weeks now and I must say that it is relatively easy to use. However, the hard part is syncing the audio back to the video in post production. I was able to do this in iMovie with great difficulty. (Maybe i missed the easy way to do this. ) I found it much easier to use Final Cut Express to sync the audio.
Last weekend, I recorded my daughters show choir group performing the National Anthem at a local baseball park. I created three videos with different levels of sound. The first video is using the internal microphone of the Canon 7D. The second is using the audio from the Zoom H4n. Both audio tracks were normalized before uploaded to YouTube.
In the final video, I played around with noise reduction using Audacity. Check out the videos.
Using the internal Canon 7D Microphone Audio Normalized
Using H4n Audio Normalized
There is a notable sound quality improvement using the Zoom H4n. I used the included foam cover to help reduce wind noise. I am sure that I could get better results with one of those furry sock things.
Using the H4n Audio with Noise reduction
I think I went too far with the noise reduction. I added about 10dB or noise reduction. I think if I play with the settings, I can get better results. There is always next time.
Conclusion
If you want your audio to match your video, the Zoom H4n is an excellent solution. It is a more expensive solution then an external microphone, but you have so much more control and ability to place the audio recording separate from the video recording on the Canon 7D.